22.09.2017 - Large update
New features
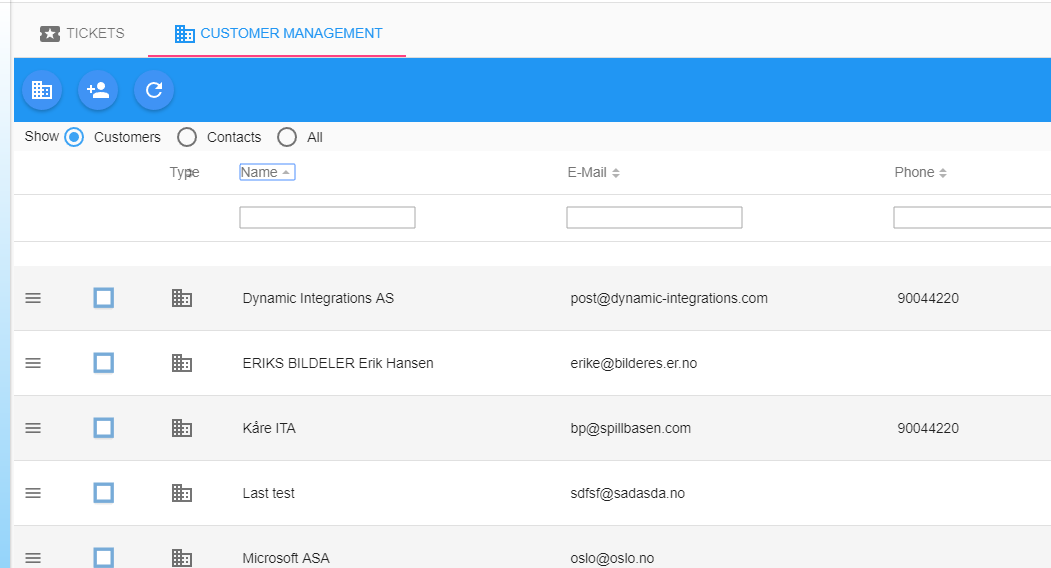
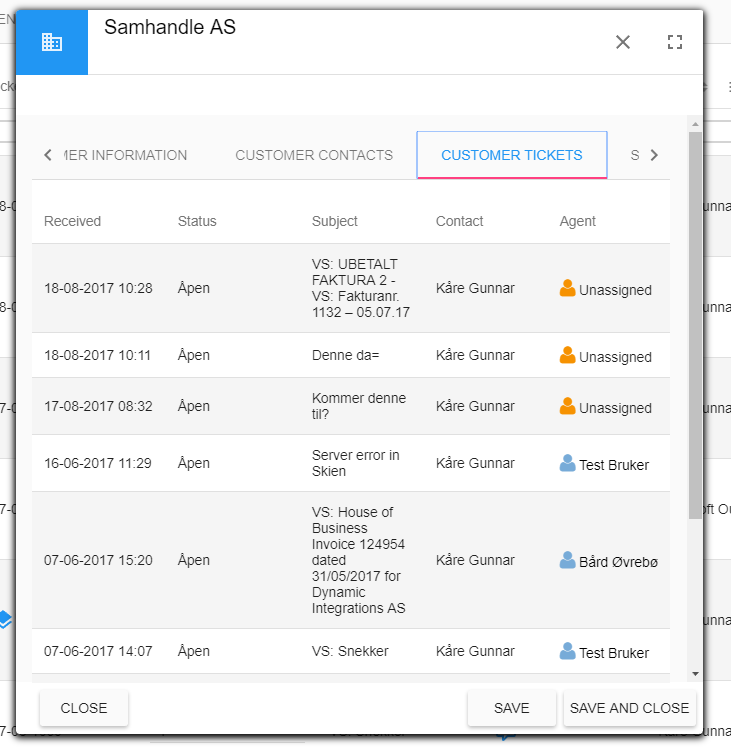
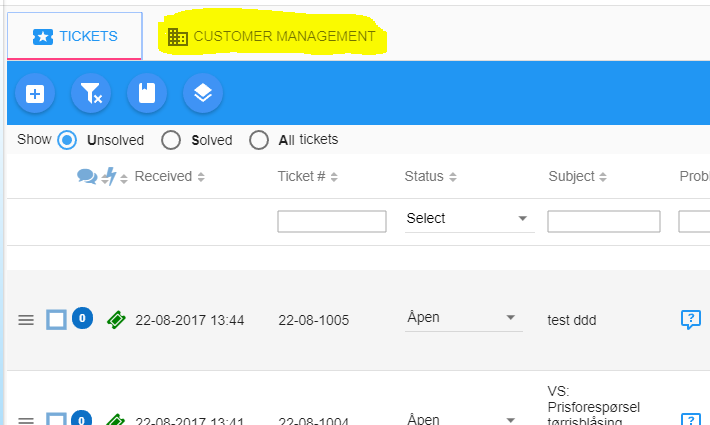 After selecting the tab you are presented with this screen. You use it the same way that you use the ticket overview, search the different boxes or sort by clicking the sort icons.
To open a customer or contact, click the appropriate row.
After selecting the tab you are presented with this screen. You use it the same way that you use the ticket overview, search the different boxes or sort by clicking the sort icons.
To open a customer or contact, click the appropriate row.
2. Customer contacts in customer details.
You are now able to see and search through all contacts attached to a customer directly from the customer details.
Open a customer directly from ticket overview, customer widget or the customer management.

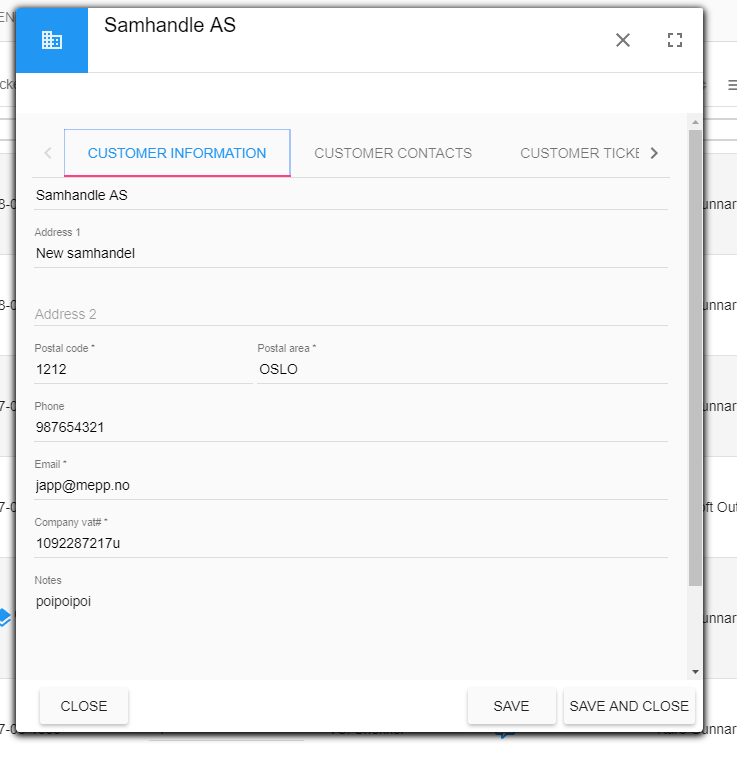
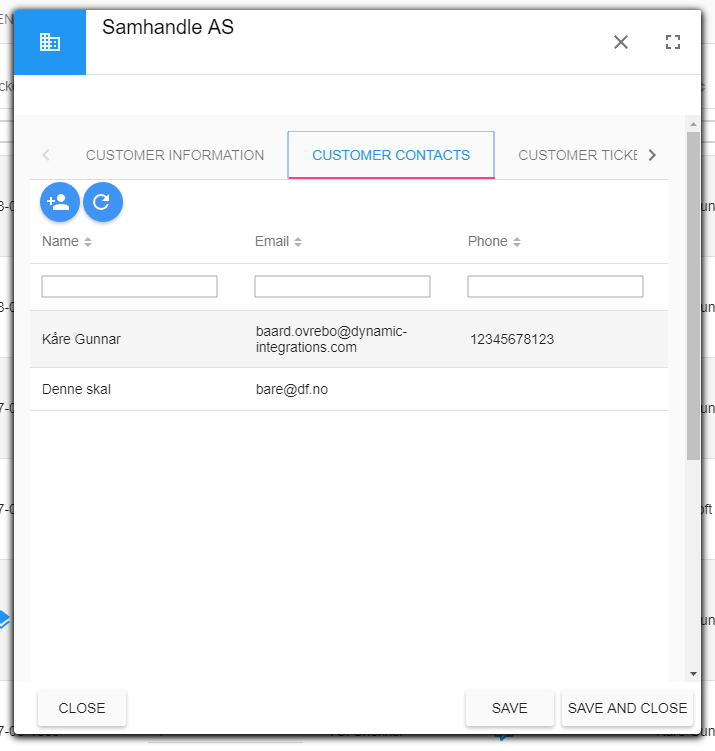
Click "Customer contacts" and you will see all contacts attached to that customer. Clicking on a contact in the list will open the contact details.

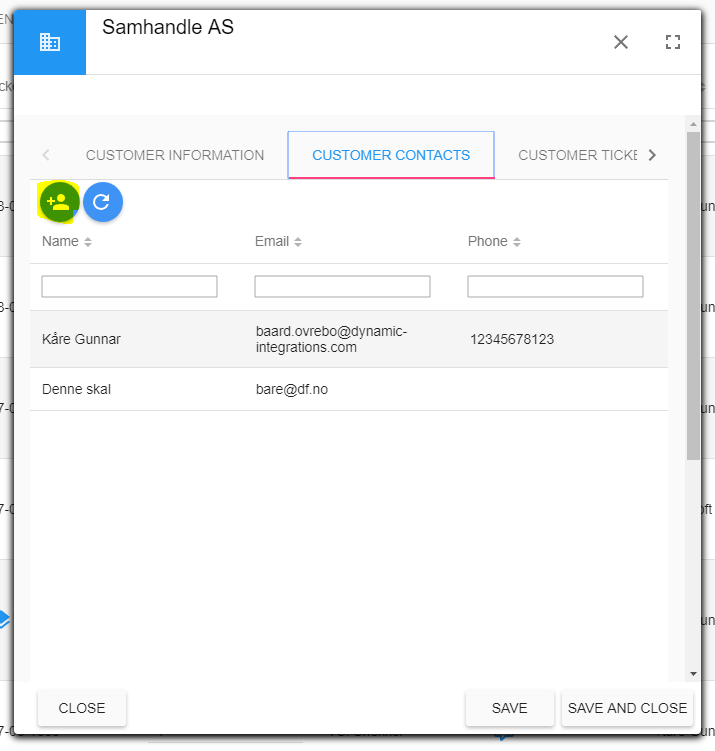
To create a new user/contact for the selected customer, click the create new user button (marked in yellow)

This will open a new window where you need to fill out details regarding the new user/contact.
When you have entered all details required and clicked Save & close you need to refresh the list in order to see it.
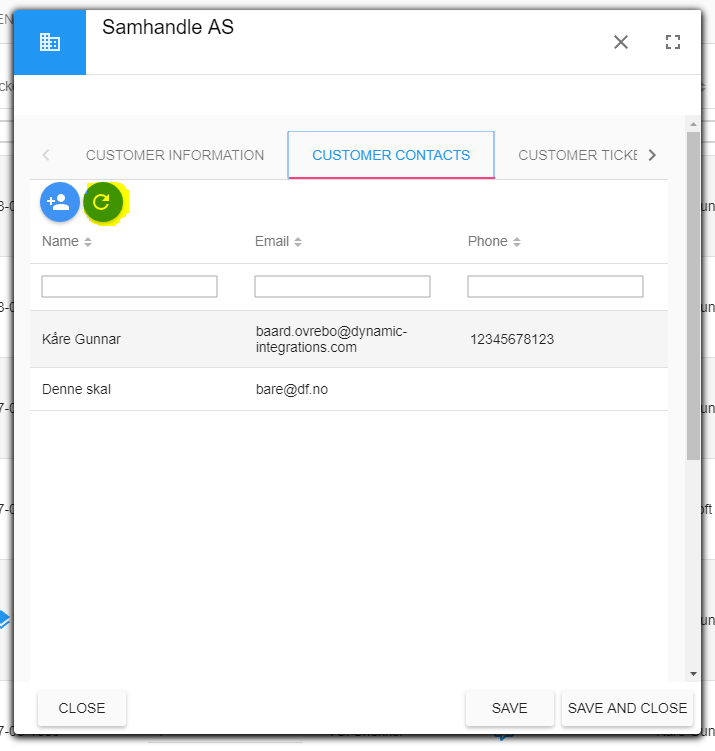
To refresh the list, click the refresh button (marked in yellow)
 Click "Customer contacts" and you will see all contacts attached to that customer. Clicking on a contact in the list will open the contact details.
 To create a new user/contact for the selected customer, click the create new user button (marked in yellow)
 This will open a new window where you need to fill out details regarding the new user/contact.
When you have entered all details required and clicked Save & close you need to refresh the list in order to see it.
To refresh the list, click the refresh button (marked in yellow)
This will open a new window where you need to fill out details regarding the new user/contact.
When you have entered all details required and clicked Save & close you need to refresh the list in order to see it.
To refresh the list, click the refresh button (marked in yellow)
Changes marked with red text means that the change has an large impact as to how to use the application. This can be content moved to other locations.4. We have added a new role called Service agent.
This role is assignable to an read only user. In other words, no extra costs for a service agent.
A service agent is someone who receives a task to solve in a ticket.
When having completed the task the service agent can submit his/her work for approval by the dispatcher (dispatcher being the person assigning the ticket to the service agent)
To activate a user as a service agent you will either need to create a new user and assign it access level Read only or add the role to an existing read only.
Be aware that you can only make a new user a read only user, it is not possible to change an agent to an read only type.
Open SmartDialog settings, click users and click Add new.
The add new user window appears. Click the Access list where it says Agent.
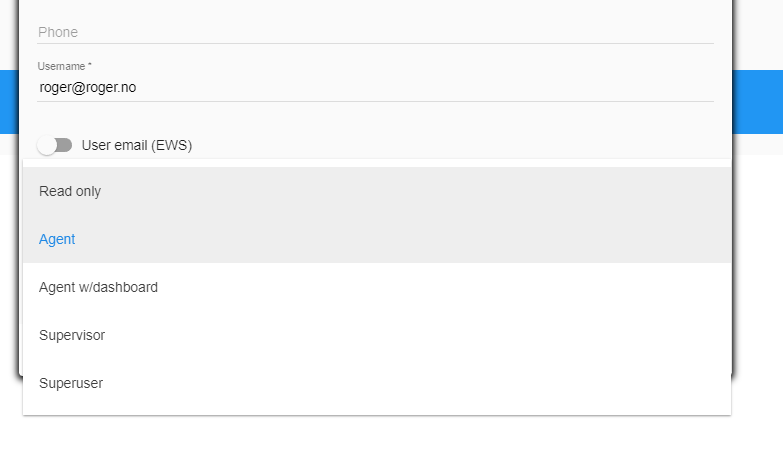
Select Read Only
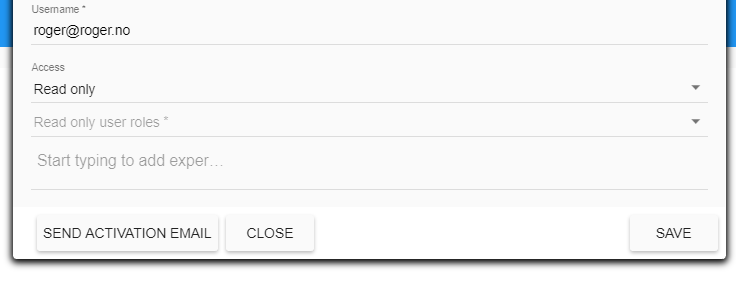
Next you will need to assign a role to the Read only user. Click the read only user roles
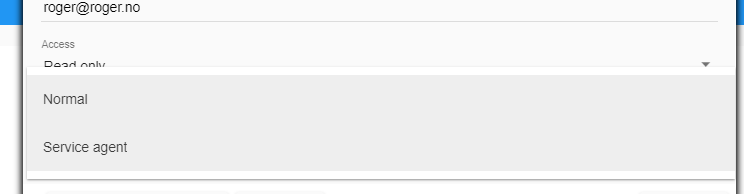
Select Service Agent
Click save to commit the changes and close the window.
You have now created a new Service agent. He will receive an email telling him to create a password to login to SmartDialog.
You can now assign a ticket to the Service Agent as you normally would assign a ticket to any other agent.
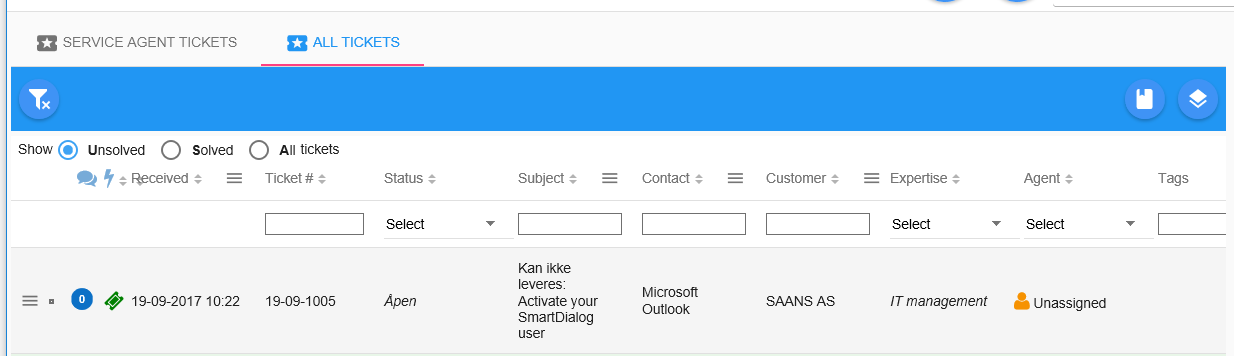
This is how a ticket that is assigned to a service agent looks in the ticket overview.
The yellowish background and this icon tells you that the ticket is assigned to a service agent and the service agent has not yet completed his/her task.
When the service agent has completed his/her task the ticket in ticket overview will look like this
The greenish background and this icontells you that the ticket is assigned to a service agent and the service agent has completed his/her task.
6. Checklists
SmartDialog now supports checklists.

You can create a new checklist template in checklist administration, this can be accessed from two places;

1. Through the ticket superuser menu


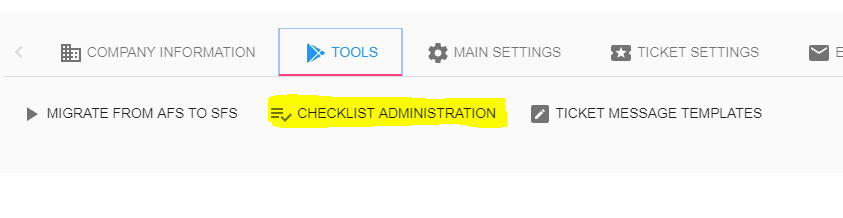
2. Through SmartDialog settings tools menu
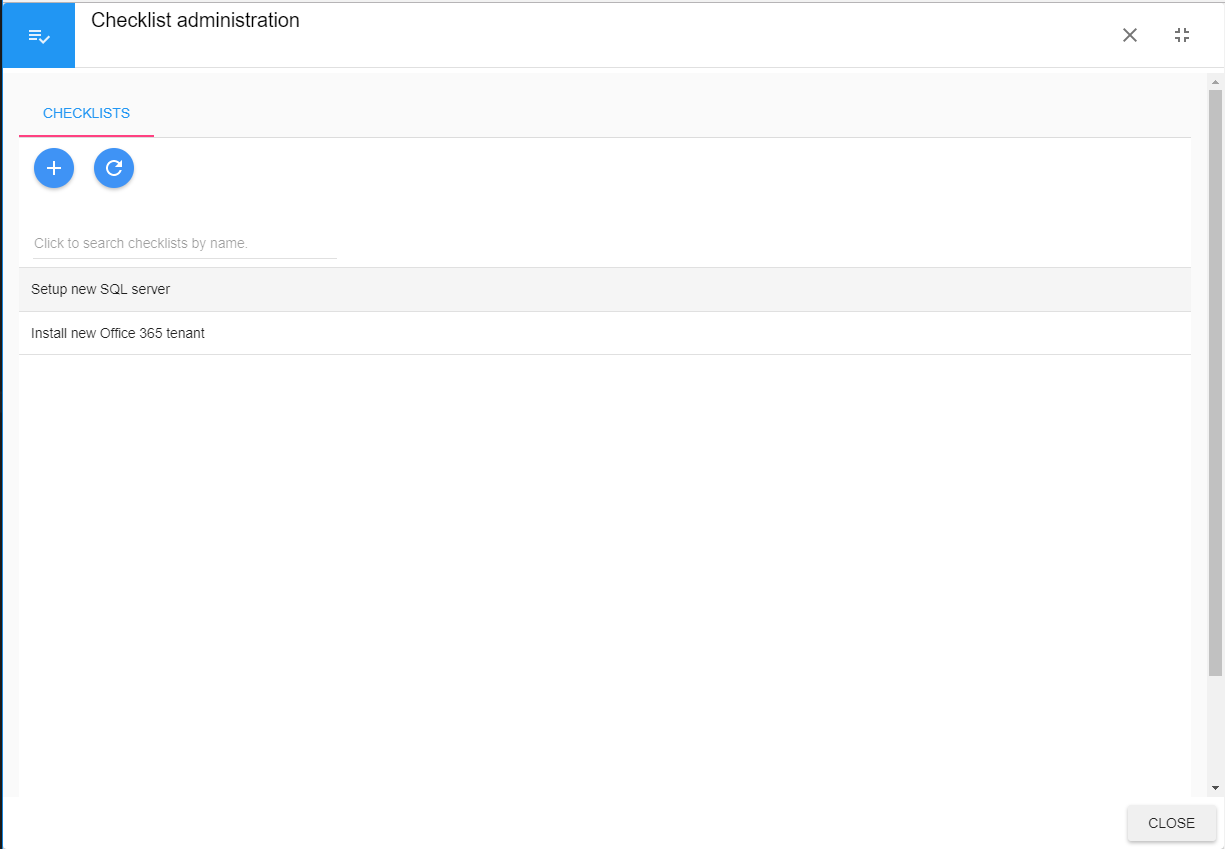
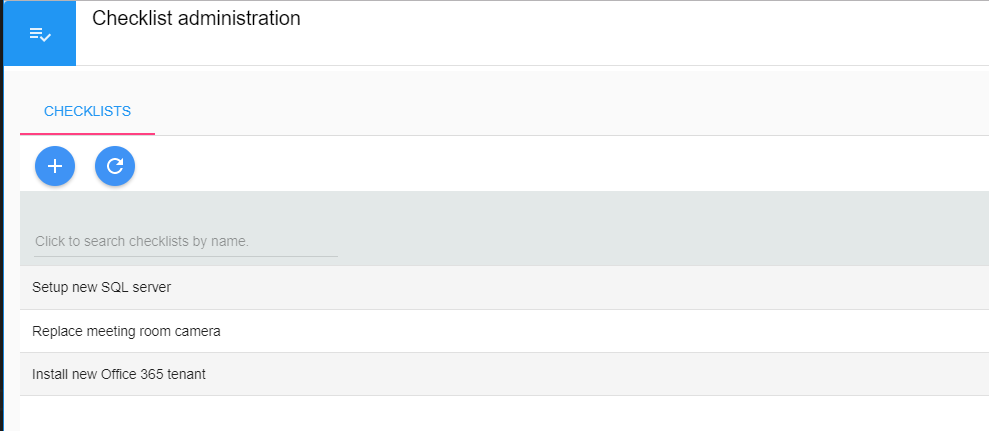
To create a new checklist, open the checklist administration.
This will display all current checklists and enable you to search through all existing by typing in your query in the Search checklists by name box

The  button will create a new checklist.
The button will refresh the existing checklists.


To edit a checklist, click the checklist you wish to edit.


Creating and editing a checklist works in the same way. Click the  button.


You are now able to create a new checklist.


Start out by giving it a friendly name. The name should be descriptive for the task.


Next, click the  to add a task to the checklist.
It will ask you to describe the task.
Type in something descriptive.


Click add, you will be returned to the checklist wich now contains a task
You are now able to remove it by clicking the or add another task by clicking the


When you have added all the tasks click Submit. This will save the checklist template and return to the checklist administration window


You can now assign a template to a ticket.

It is important to know that when you add a checklist to a ticket, you add the current checklist.
Any changes made to the checklist template after that will not have any impact to the tickets checklist.
In order to have the updated checklist in the ticket you will need to re add the checklist to the ticket.


Adding a checklist to a ticket can be done from the ticket window.


Open a ticket and click the Options tab under the ticket actions section


Click the field for searching for checklist and start searching for a checklist by name.


Select the checklist from the list. Clicking the X will remove the checklist from the ticket.
NB: Once a task in the checklist is checked it will not be possible to change the connected checklist.
To set another checklist to the ticket you will then need to unselect all checked boxes in the checklist first.

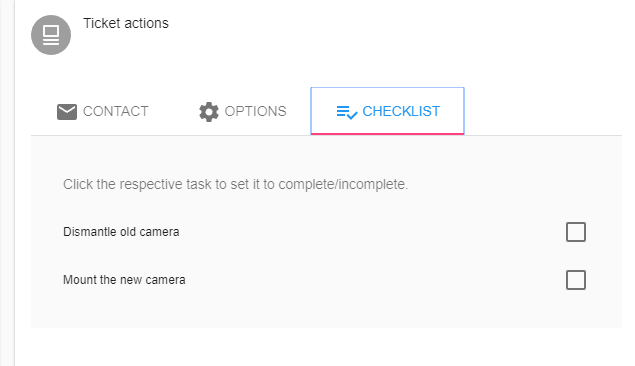
The checklist is now connected to the ticket. As you can see a new tab has appeared.
Click the tab to display the checklist. Clicking a task will set it as complete.


Making changes to a checklist will require you to save ticket changes.


You will also need to save ticket changes when assigning a checklist to a ticket.
Changes
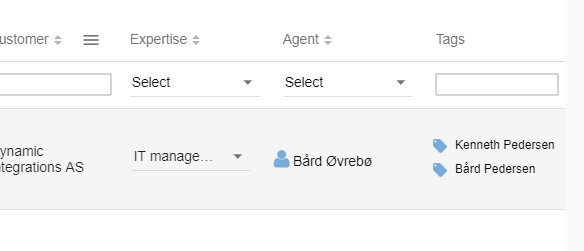
2. Made changes in ticket overview so it can display and search ticket tags.
This is a feature that you need to enable in SmartDialog settings and under Ticket overview settings under the ticket settings tab.


When enabled click "Save" in SmartDialog settings, then close. When you are returned to the ticket overview hit the F5 button to refresh SmartDialog.
The tags should now be visible
3. Displaying expertise in ticket overview is now optional. It is disabled by default. It is enabled through SmartDialog settings under Ticket settings and Ticket overview settings.
4. Displaying agent in ticket overview is now optional. It is disabled by default. It is enabled through SmartDialog settings under Ticket settings and Ticket overview settings.
5. Added menus that belong to the different sections in SmartDialog.
With this change most of the buttons on the top row has been moved to their respective places under their page.


This is how the top button bar looked before the change


This is how it looks with this version


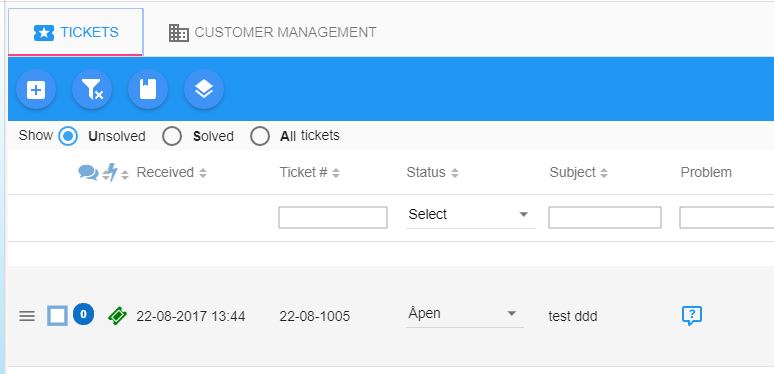
We have moved all ticket related buttons to the ticket overview page


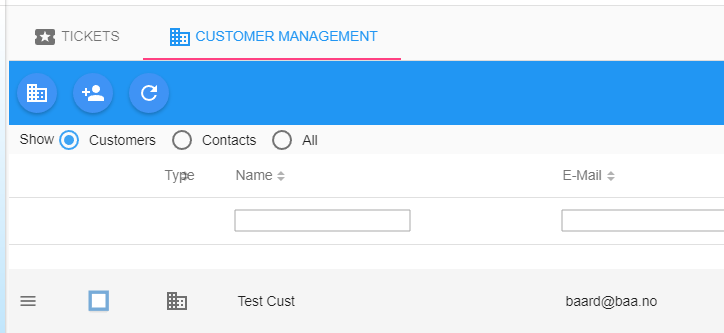
Customer management has also it's own button bar
6. Changed the design of the login page.
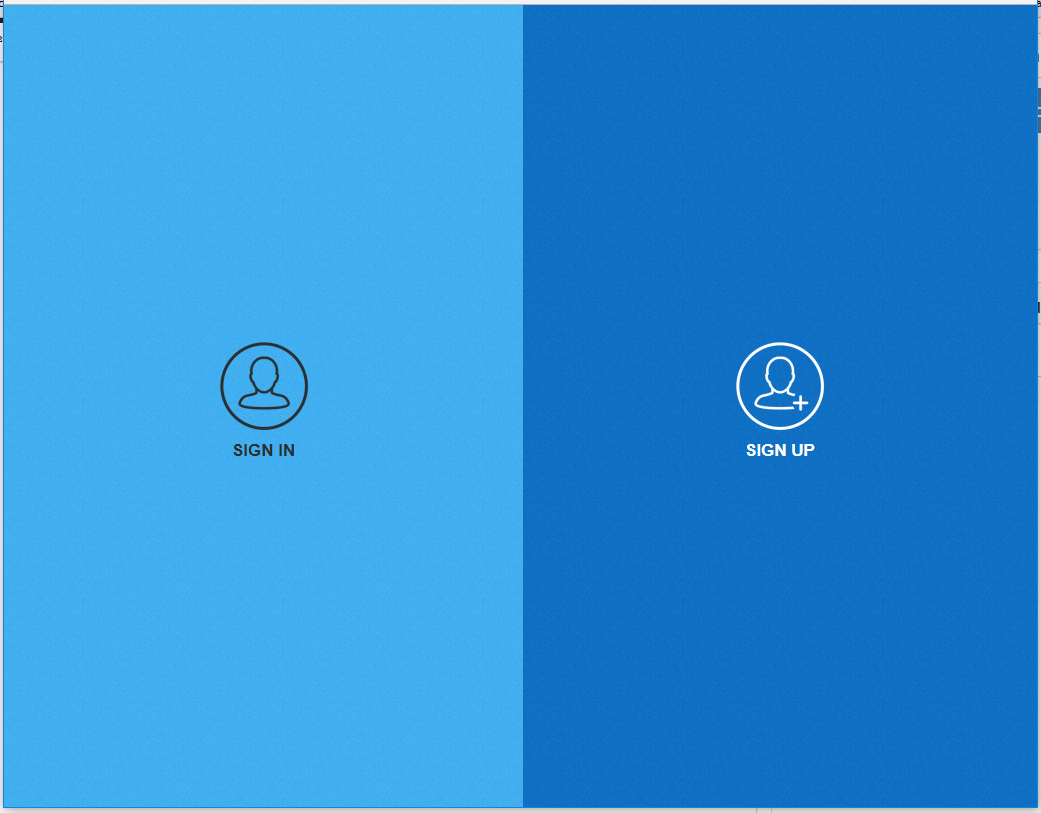
We replaced the login screen with a brand new one.
The new screen will work on all devices and resolutions where the old login did not.


The old login


The new login screen
7. Added Dialogue center to ticket overview.
This version includes the dialogue center in ticket overview.
It enables you to read/write messages and notes in a ticket without opening the ticket details window.
Click the menu icon of the ticket you wish to see the dialogue and select Dialogue center


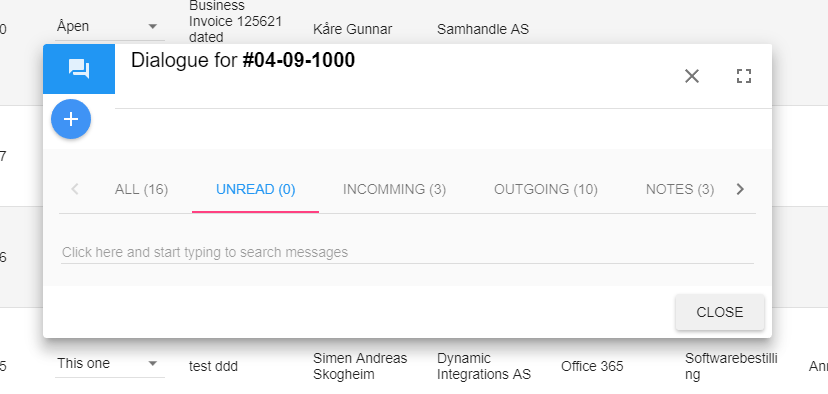
This opens the dialogue center for the selected ticket. The dialogue center is similar to the one in ticket details.
It also updates live.
If a new messages is received for the ticket you have opened, it will automatically appear under incoming and unread.
8. Replaced dialogue in ticket edit.
This will have a large impact in performance since it now only loads messages when clicking the different message types.
Previous version of SmartDialog loads all ticket messages when opening an ticket.
Now it will only load unread messages, then load on demand for the other categories.
Fixes
1. We made some adjustments to the dialogue where you search for tickets when converting an email or ticket to a ticket message. It should now show the proper result.
2. We made some adjustments to the dialogue where you search for users when converting an email to a ticket. It should now show the proper result.
3. Made fixes to the ticket overview search where old searches where not removed from the search array when opening a ticket and returning to the overview.
4. When receiving messages to a ticket that is set to solved it is not reopened and displayed in unsolved tickets. This is now fixed.
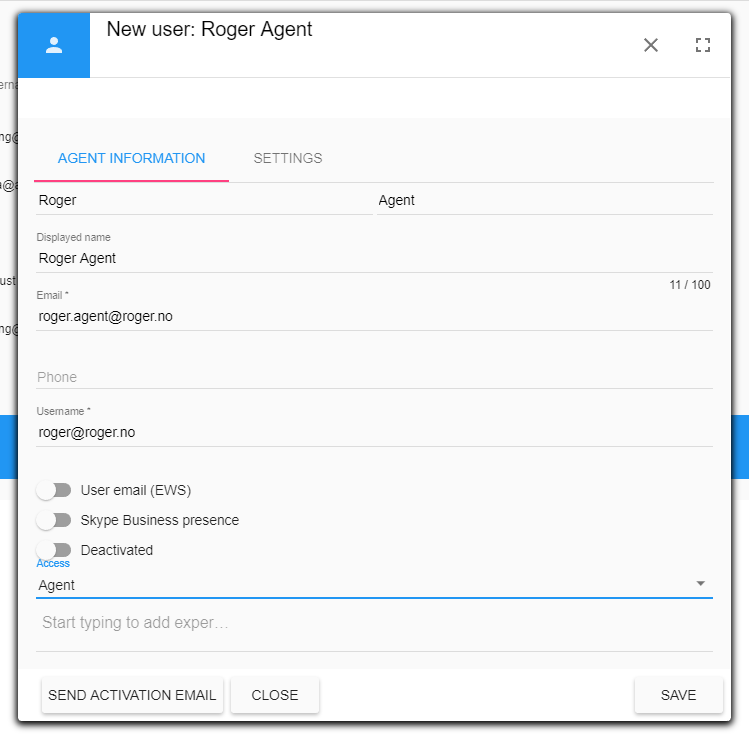 Select Read Only
 Next you will need to assign a role to the Read only user. Click the read only user roles
 Select Service Agent
 Click save to commit the changes and close the window.
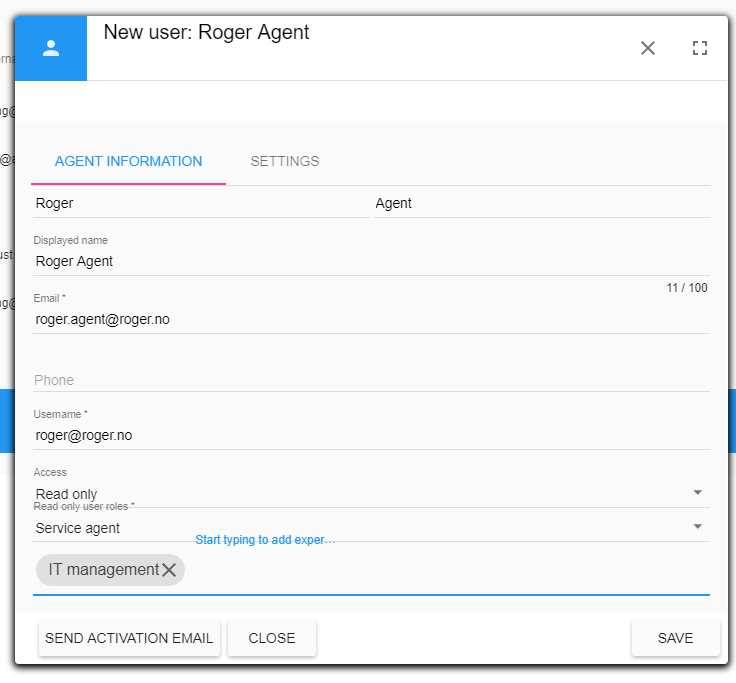 You have now created a new Service agent. He will receive an email telling him to create a password to login to SmartDialog.
You can now assign a ticket to the Service Agent as you normally would assign a ticket to any other agent.
This is how a ticket that is assigned to a service agent looks in the ticket overview.
You have now created a new Service agent. He will receive an email telling him to create a password to login to SmartDialog.
You can now assign a ticket to the Service Agent as you normally would assign a ticket to any other agent.
This is how a ticket that is assigned to a service agent looks in the ticket overview.
 The yellowish background and this icon
 tells you that the ticket is assigned to a service agent and the service agent has not yet completed his/her task.
When the service agent has completed his/her task the ticket in ticket overview will look like this
tells you that the ticket is assigned to a service agent and the service agent has not yet completed his/her task.
When the service agent has completed his/her task the ticket in ticket overview will look like this
 The greenish background and this icon
 tells you that the ticket is assigned to a service agent and the service agent has completed his/her task.
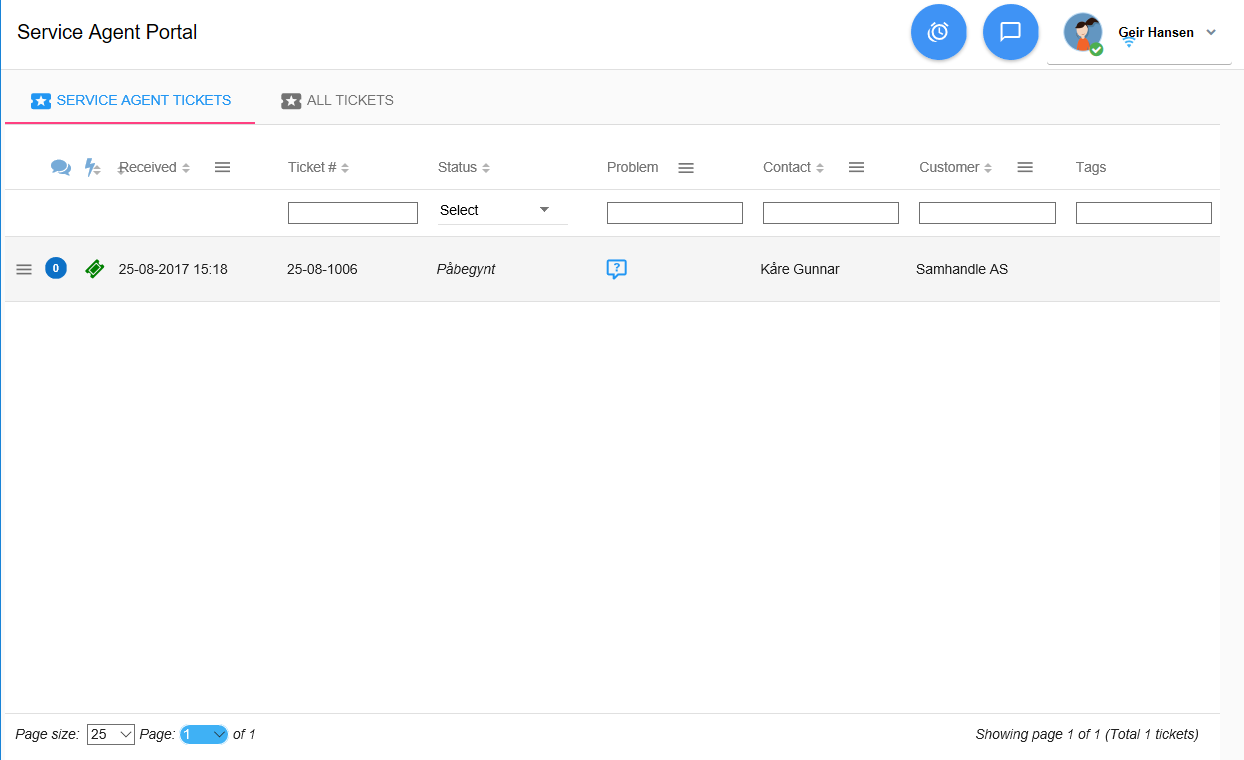 Clicking the
  icon will show the tickets problem description.
Clicking the
icon will show the tickets problem description.
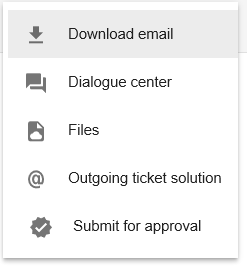
Clicking the  will display the Service agent menu.
The service agent menu allows the SA (Service Agent) to perform different actions on the ticket.
Download email will download an .msg file wich is a copy of the original email sent to SmartDialog.
Dialogue center will open a window containing all messages, notes and system messages for the ticket.
The SA can send a message to the dispatcher or add a note to the ticket from this window.
Files will open a windows displaying all incoming and outgoing files. The SA can also upload and download files.
Outgoing ticket solution opens a window displaying the current solution of the ticket. The SA can edit and save the description
Submit for approval will set the task complete by the SA and warn the dispatcher that the SA has completed his assignment.
The dispatcher will then check the notes, files or any other changes that the SA made.
If the ticket is complete the dispatcher can set the status to solved and finish the ticket.
will display the Service agent menu.
The service agent menu allows the SA (Service Agent) to perform different actions on the ticket.
Download email will download an .msg file wich is a copy of the original email sent to SmartDialog.
Dialogue center will open a window containing all messages, notes and system messages for the ticket.
The SA can send a message to the dispatcher or add a note to the ticket from this window.
Files will open a windows displaying all incoming and outgoing files. The SA can also upload and download files.
Outgoing ticket solution opens a window displaying the current solution of the ticket. The SA can edit and save the description
Submit for approval will set the task complete by the SA and warn the dispatcher that the SA has completed his assignment.
The dispatcher will then check the notes, files or any other changes that the SA made.
If the ticket is complete the dispatcher can set the status to solved and finish the ticket.
 If the SA wishes to search through the ticket history, he/she can do so by clicking the "All tickets" tab
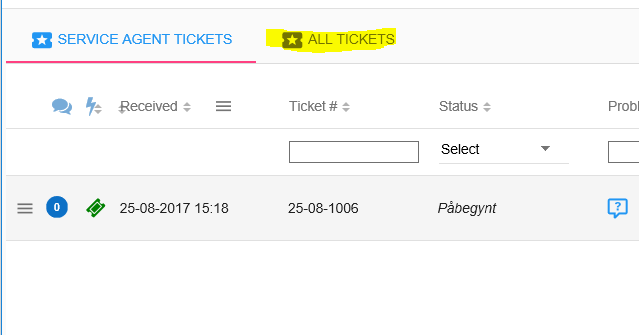 This will open the normal ticket overview.
The service agent can open tickets to look at their contents. But is not able to make any changes to any of the fields. This is the same view as a normal read only user sees.
This will open the normal ticket overview.
The service agent can open tickets to look at their contents. But is not able to make any changes to any of the fields. This is the same view as a normal read only user sees.
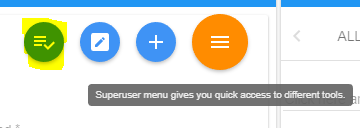 2. Through SmartDialog settings tools menu
 To create a new checklist, open the checklist administration.
This will display all current checklists and enable you to search through all existing by typing in your query in the Search checklists by name box
The
To create a new checklist, open the checklist administration.
This will display all current checklists and enable you to search through all existing by typing in your query in the Search checklists by name box
The  button will create a new checklist.
The
button will create a new checklist.
The  button will refresh the existing checklists.
To edit a checklist, click the checklist you wish to edit.
button will refresh the existing checklists.
To edit a checklist, click the checklist you wish to edit.
 Creating and editing a checklist works in the same way. Click the
  button.
You are now able to create a new checklist.
button.
You are now able to create a new checklist.
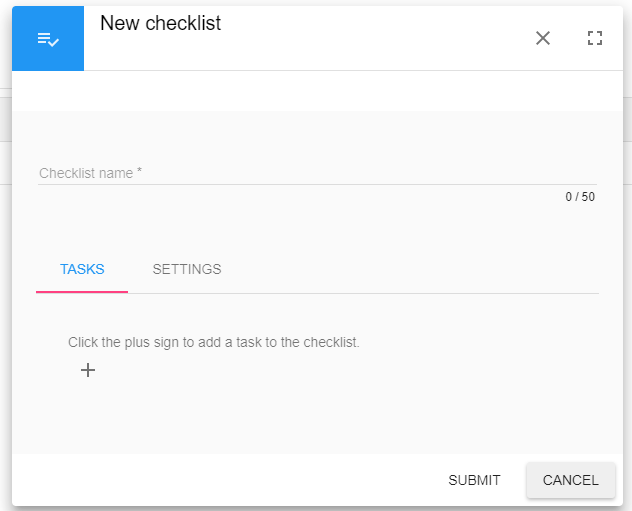 Start out by giving it a friendly name. The name should be descriptive for the task.
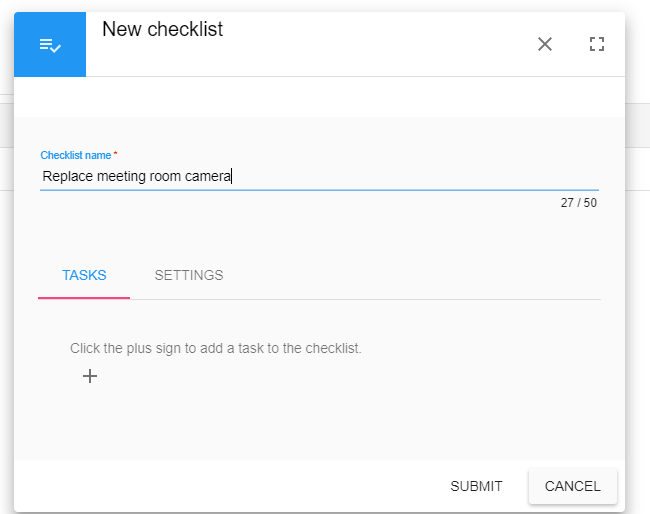 Next, click the
  to add a task to the checklist.
It will ask you to describe the task.
Type in something descriptive.
to add a task to the checklist.
It will ask you to describe the task.
Type in something descriptive.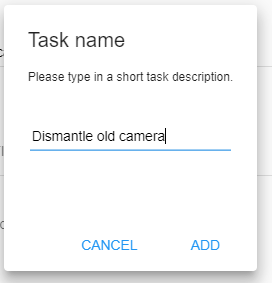 Click add, you will be returned to the checklist wich now contains a task
You are now able to remove it by clicking the
Click add, you will be returned to the checklist wich now contains a task
You are now able to remove it by clicking the  or add another task by clicking the
 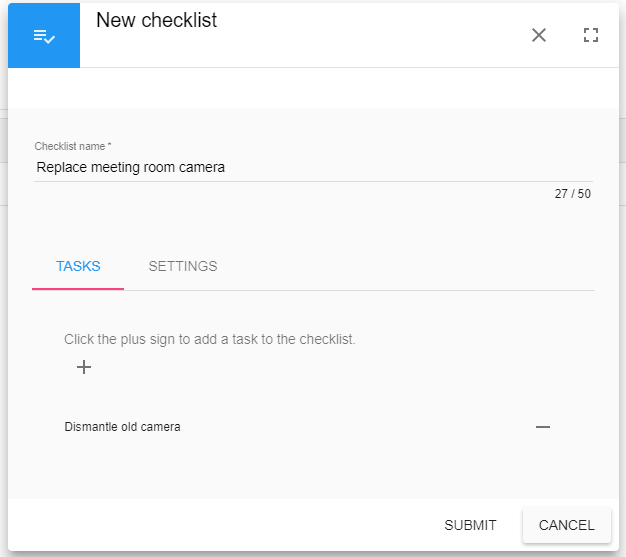 When you have added all the tasks click Submit. This will save the checklist template and return to the checklist administration window
 You can now assign a template to a ticket.
It is important to know that when you add a checklist to a ticket, you add the current checklist.
Any changes made to the checklist template after that will not have any impact to the tickets checklist.
In order to have the updated checklist in the ticket you will need to re add the checklist to the ticket.
Adding a checklist to a ticket can be done from the ticket window.
Open a ticket and click the Options tab under the ticket actions section
You can now assign a template to a ticket.
It is important to know that when you add a checklist to a ticket, you add the current checklist.
Any changes made to the checklist template after that will not have any impact to the tickets checklist.
In order to have the updated checklist in the ticket you will need to re add the checklist to the ticket.
Adding a checklist to a ticket can be done from the ticket window.
Open a ticket and click the Options tab under the ticket actions section
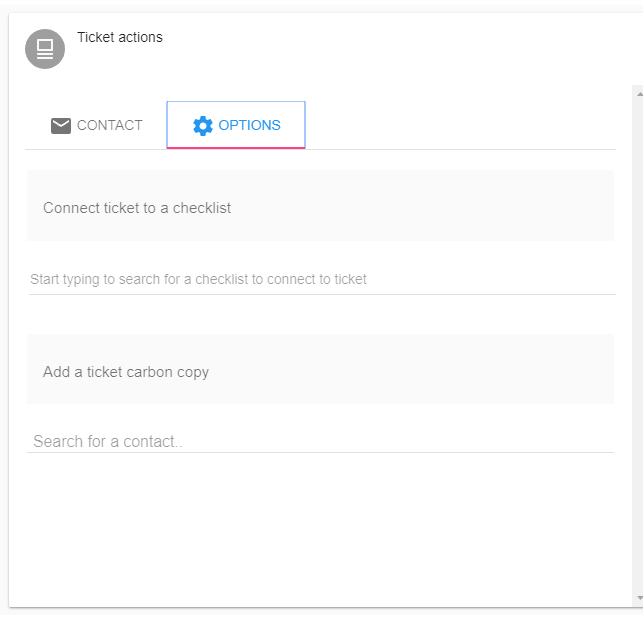 Click the field for searching for checklist and start searching for a checklist by name.
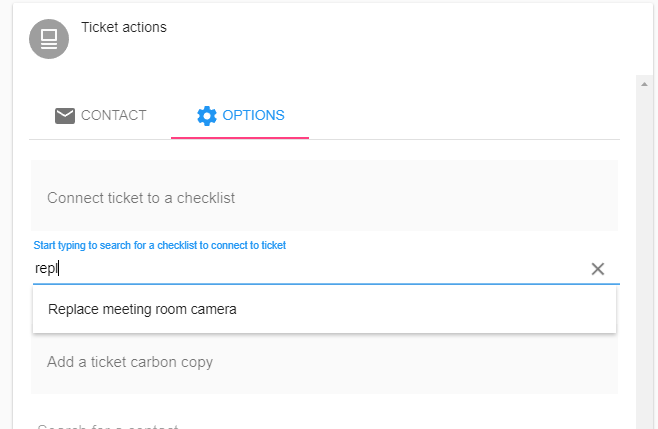 Select the checklist from the list. Clicking the X will remove the checklist from the ticket.
NB: Once a task in the checklist is checked it will not be possible to change the connected checklist.
To set another checklist to the ticket you will then need to unselect all checked boxes in the checklist first.
Select the checklist from the list. Clicking the X will remove the checklist from the ticket.
NB: Once a task in the checklist is checked it will not be possible to change the connected checklist.
To set another checklist to the ticket you will then need to unselect all checked boxes in the checklist first.
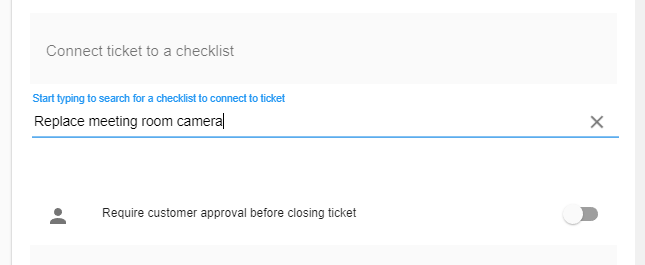 The checklist is now connected to the ticket. As you can see a new tab has appeared.
Click the tab to display the checklist. Clicking a task will set it as complete.
The checklist is now connected to the ticket. As you can see a new tab has appeared.
Click the tab to display the checklist. Clicking a task will set it as complete.
 Making changes to a checklist will require you to save ticket changes.
You will also need to save ticket changes when assigning a checklist to a ticket.
Making changes to a checklist will require you to save ticket changes.
You will also need to save ticket changes when assigning a checklist to a ticket.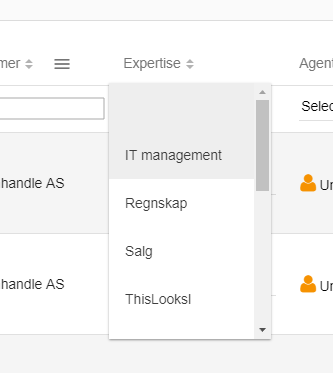
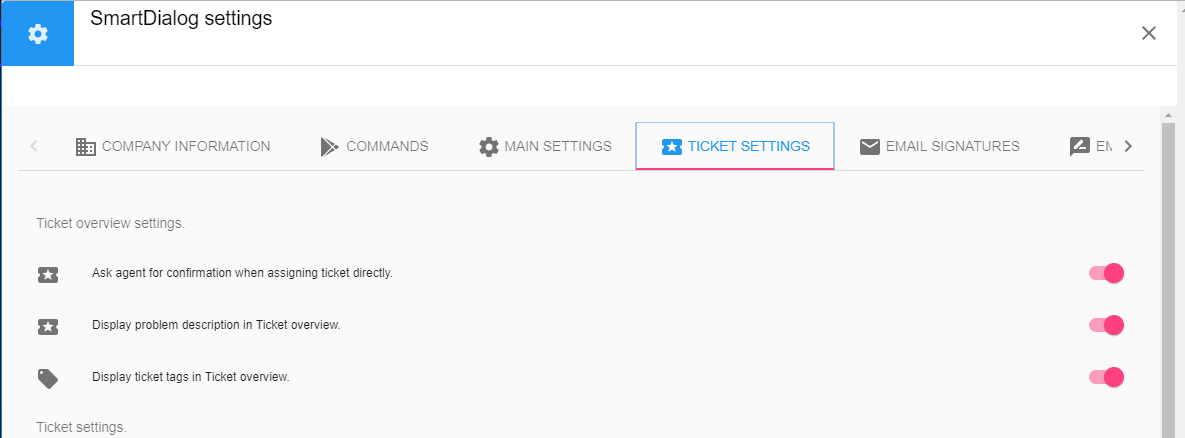 When enabled click "Save" in SmartDialog settings, then close. When you are returned to the ticket overview hit the F5 button to refresh SmartDialog.
The tags should now be visible
When enabled click "Save" in SmartDialog settings, then close. When you are returned to the ticket overview hit the F5 button to refresh SmartDialog.
The tags should now be visible
 This is how it looks with this version
 We have moved all ticket related buttons to the ticket overview page
 Customer management has also it's own button bar
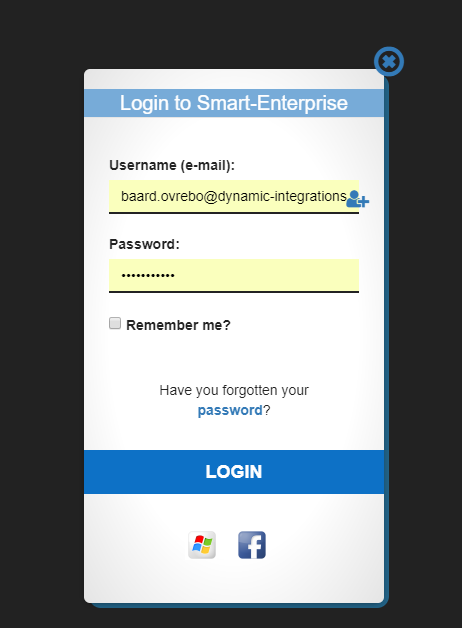 The new login screen
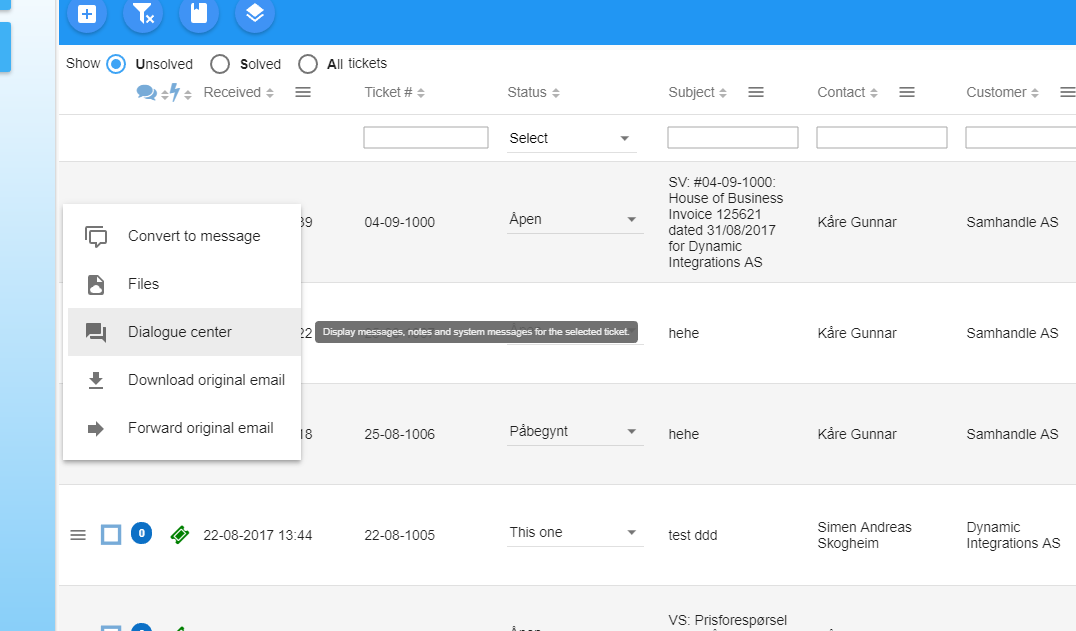 This opens the dialogue center for the selected ticket. The dialogue center is similar to the one in ticket details.
It also updates live.
If a new messages is received for the ticket you have opened, it will automatically appear under incoming and unread.
This opens the dialogue center for the selected ticket. The dialogue center is similar to the one in ticket details.
It also updates live.
If a new messages is received for the ticket you have opened, it will automatically appear under incoming and unread.