11.05.2017 - Large update
New features
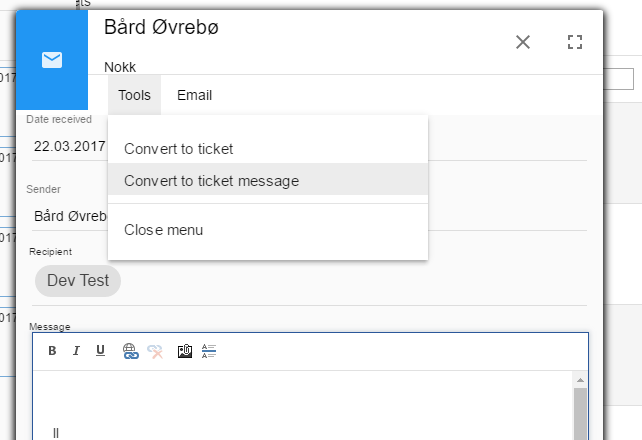
 Or you can click "Convert to ticket message" from within an open email:
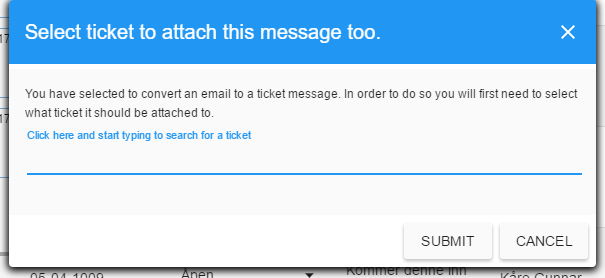
 This window will open, focus on the textbox that says "Click here and start typing...."
 You can search for a ticket by typing the ticket subject or the ticketnumber.
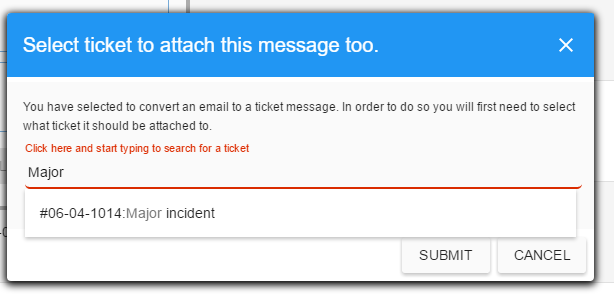
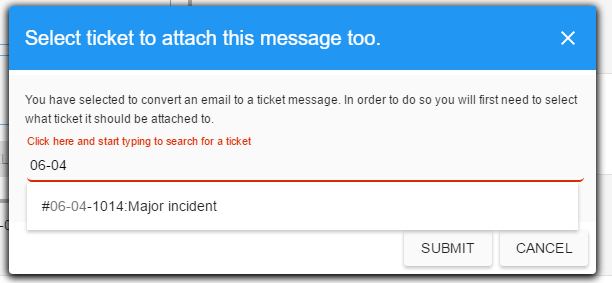 Select the correct ticket from the dropdown. It will then show only the ticketnumber in the textbox
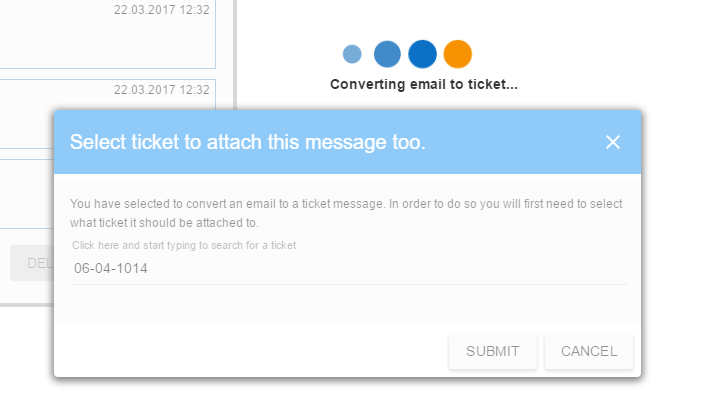
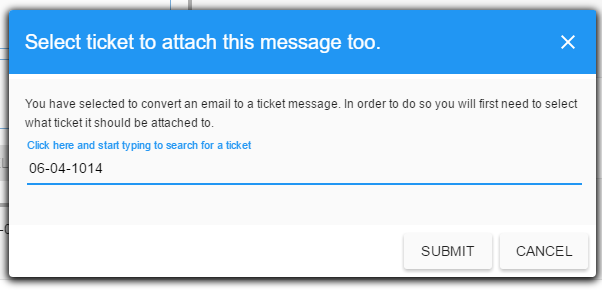 Click Submit, the email will now be converted to a ticket message for the ticket you selected.
2. Copy contact main email address.
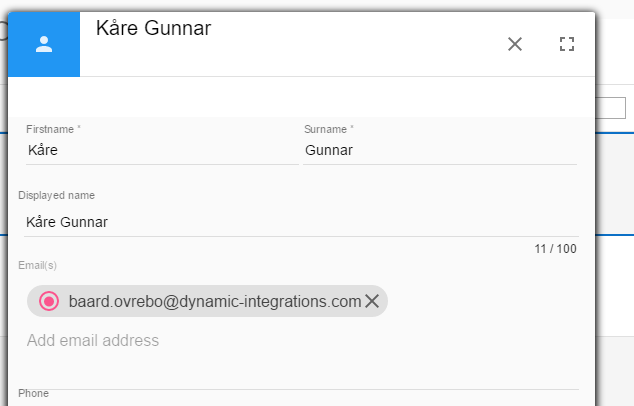
    When you edit a contact you can on your keyboard push the ALT-C  button combination to copy the main email address of the opened contact.

The main email is allways the email that has the colored circle next to it's name.
 The main email is allways the email that has the colored circle next to it's name.
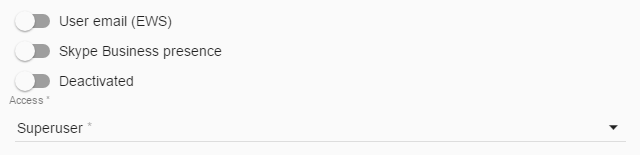
4. When selecting access level for an agent you now select from a list of roles instead of a slider.
5. Read Only users
    It is now possible to create Read only users. Read only users are free of charge users that are not able to make any changes in SmartDialog.
    Be aware that you can convert an read only user to an agent, but you can't convert an agent to an read only user.
6. Add custom fields to ticket
 With this update we enable your superuser to add custom fields in tickets.
 Custom fields can be dropdownlists, textboxes, numbers passwords and more.
 The dropdownlists can be connected to an external API provider, internal SmartDialog API or a custom made list of values.

 Only the superuser has access to adding, removing og editing custom fields.

 To add a new field, open a ticket, it does not matter what ticket.
Once open you will see the orange button at the right side of ticket settings.
This is a superuser menu and will be available all over SmartDialog in the future.


Click to see available actions in the ticket window. At the moment there is only one option; Add custom field.


Click the + button to add a new field to tickets (The new field will be available for all tickets )


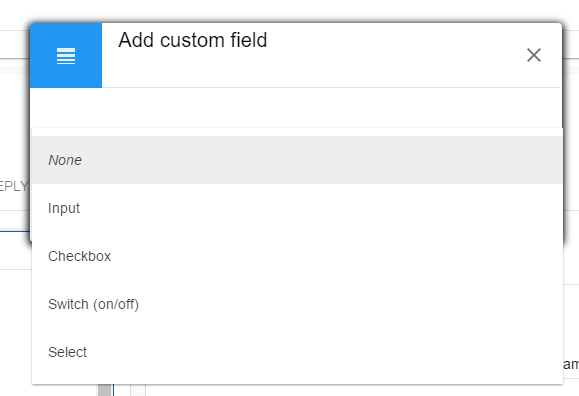
After clicking you will be presented with this window. Click the dropdown menu to select what type of field you wish to add.


Select the field type you want, in this case i will select a Checkbox.


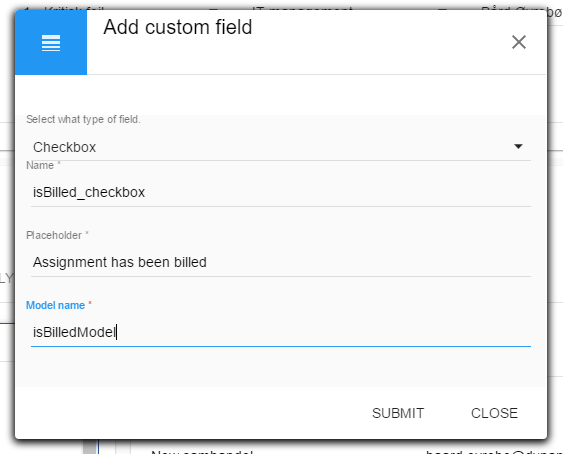
After selecting a checkbox you need to fill in a few additional parameters.

Name will describe the fields internal name, you can type whatever you want.
Placeholder is the text visible to the user describing what the field is.
Model is what you want to call the object that will contain the selected value inside the ticket.


Once you have entered information into all required fields, click Submit.


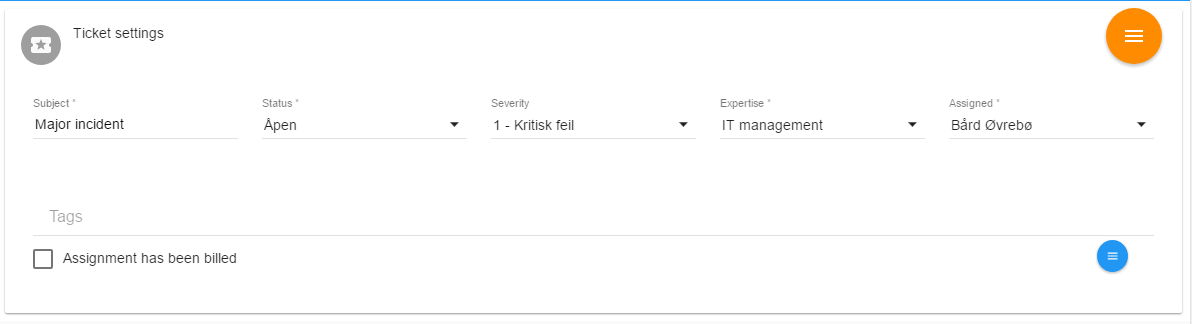
The ticket now contains a new field, the checkbox i just added. The new field will be visible in all existing and new tickets.

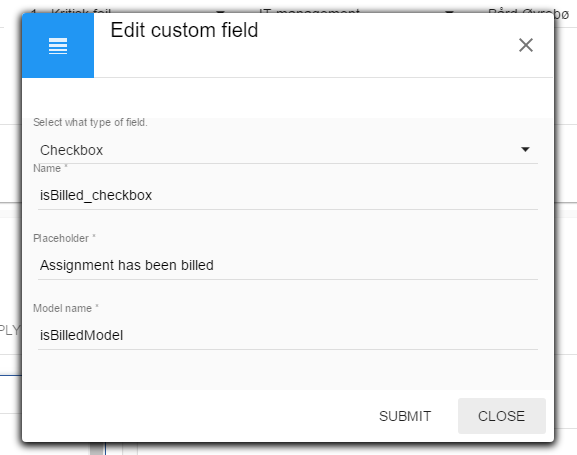
If you want to edit or delete the field you just added, click the blue button on the same row as the field.


Click edit field will open the property window


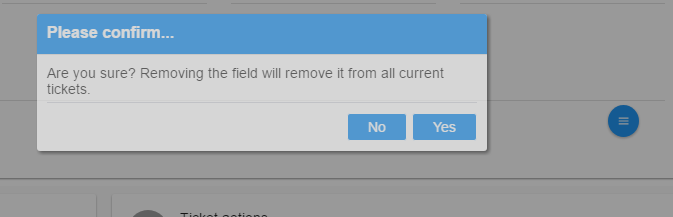
Clicking the minus button (Delete) will remove the field.


There is alot more features and functionality in the custom fields.
For more detailed information please read the Custom fields documentation (DOCUMENTATION IN DEVELOPMENT)
7. Select between different expertises (departments)
It is now possible for the agent to select an specific expertise in the ticket table. By default the agent will see all
unsolved tickets for all the expertises he/she is a member off. Clicking the expertise button on the button bar at
the top will display all the expertises he/she is a member of in order to switch between the different expertises.
9. Send ticket messages using the main email of the expertise as sender. (*)
It's now possible to send from an expertise main email address.
*This feature will only work if you are hosting your own email or we are hosting it for you since it requires "Send as" access to the distribution lists that are linked to SmartDialog.


To use this feature you will need to create an distribution list in your Exchange tenant for each expertise, next you will need to give "Send as" access to SmartDialog's main email account.
Please remember to add SmartDialogs main email account as an member, if this has not been done; SmartDialog will not receive replies made to the outgoing email from the respective expertise.


When this is done you can create expertises for each of the distribution lists you have created in SmartDialog.
Start by typing in a name for the expertise, then type in the email address of the distribution list and hit Enter.
Next enable the switch marked in yellow below.


If you add more than 1 email address to the expertise only the first you add will be used as a sender address.


After this has been set all outgoing messages from tickets that are a member of the set expertise will use the expertises email address instead of SmartDialog main email.
Fixes
1. Messages sent from a ticket does not allways get registered as being sent even though it has been sent.
    We have made some changes to the logic so it will wait for an response before moving on.
    We would appreciate feedback if this solves the problem to be sent to support@dynamic-integrations.com
2. When editing a contact in ticket the customer field gets blanked.
    There was a minor bug that removed the key value from customer, this has now been removed.
3. When closing the ticket edit window to return to the tickets table the padlock does not go away even though the ticket is freed.
    This was a visual bug that now has been fixed.
4. When selecting a pagesize larger than 25 and then open a ticket it is reset to the default pagesize of 25.
     This bug is now fixed.
5. When pushing the TAB key in when typing an email address the address is not correctly added.
    Bug is now fixed.
6. Setting a ticket to closed from the ticket list does not work.
   Bug is fixed
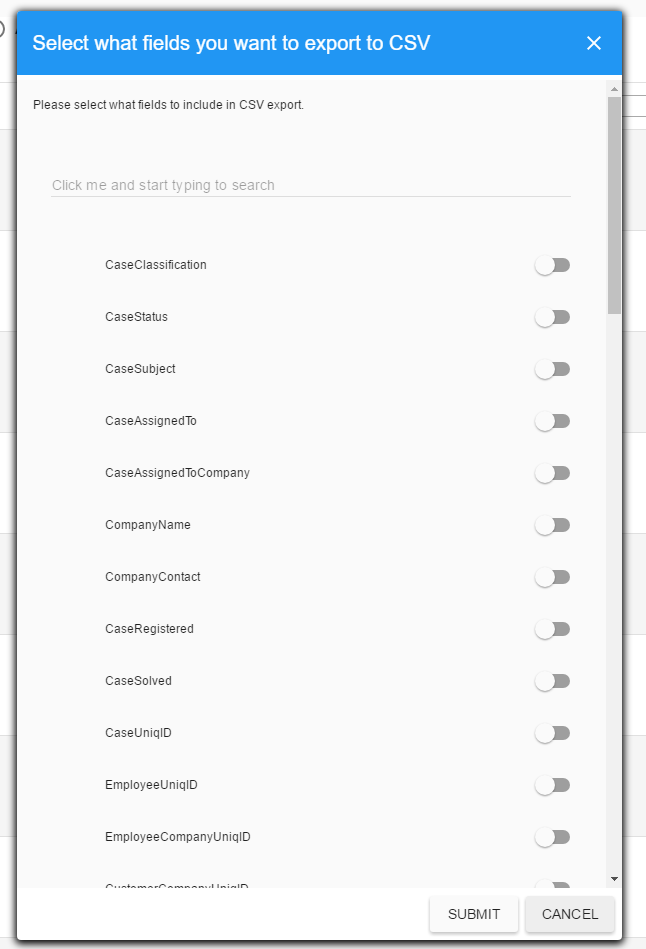
 Next you will be presented with the window in the below picture. Click a row to select/deselect for export.
You can also search through the different fields by clicking the searchbox right over the field list.
After you have made your selection you can click the Submit button, it will then save the settings and use them the next time you sign in to SmartDialog.
The fields in the list does not always have the exact same name as in the table list, but there are logic to their names so it should be easy to figure out what they are.
Next you will be presented with the window in the below picture. Click a row to select/deselect for export.
You can also search through the different fields by clicking the searchbox right over the field list.
After you have made your selection you can click the Submit button, it will then save the settings and use them the next time you sign in to SmartDialog.
The fields in the list does not always have the exact same name as in the table list, but there are logic to their names so it should be easy to figure out what they are.
 After making the selection you get another button next to the export settings button.
Click it and you will dowload the current page you are on and the current search in the table.
After making the selection you get another button next to the export settings button.
Click it and you will dowload the current page you are on and the current search in the table.

 Click to see available actions in the ticket window. At the moment there is only one option; Add custom field.
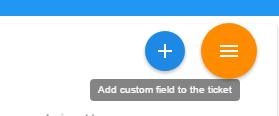 Click the + button to add a new field to tickets (The new field will be available for all tickets )
After clicking you will be presented with this window. Click the dropdown menu to select what type of field you wish to add.
Click the + button to add a new field to tickets (The new field will be available for all tickets )
After clicking you will be presented with this window. Click the dropdown menu to select what type of field you wish to add.
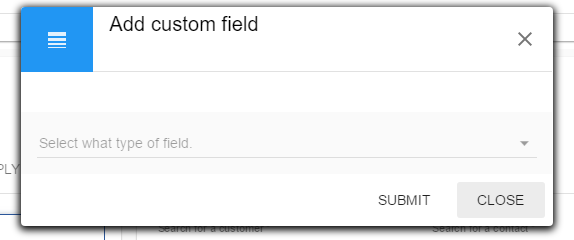 Select the field type you want, in this case i will select a Checkbox.
 After selecting a checkbox you need to fill in a few additional parameters.
Name will describe the fields internal name, you can type whatever you want.
Placeholder is the text visible to the user describing what the field is.
Model is what you want to call the object that will contain the selected value inside the ticket.
Once you have entered information into all required fields, click Submit.
After selecting a checkbox you need to fill in a few additional parameters.
Name will describe the fields internal name, you can type whatever you want.
Placeholder is the text visible to the user describing what the field is.
Model is what you want to call the object that will contain the selected value inside the ticket.
Once you have entered information into all required fields, click Submit.
 The ticket now contains a new field, the checkbox i just added. The new field will be visible in all existing and new tickets.
 If you want to edit or delete the field you just added, click the blue button on the same row as the field.
 Click edit field will open the property window
 Clicking the minus button (Delete) will remove the field.
 There is alot more features and functionality in the custom fields.
For more detailed information please read the Custom fields documentation (DOCUMENTATION IN DEVELOPMENT)
There is alot more features and functionality in the custom fields.
For more detailed information please read the Custom fields documentation (DOCUMENTATION IN DEVELOPMENT)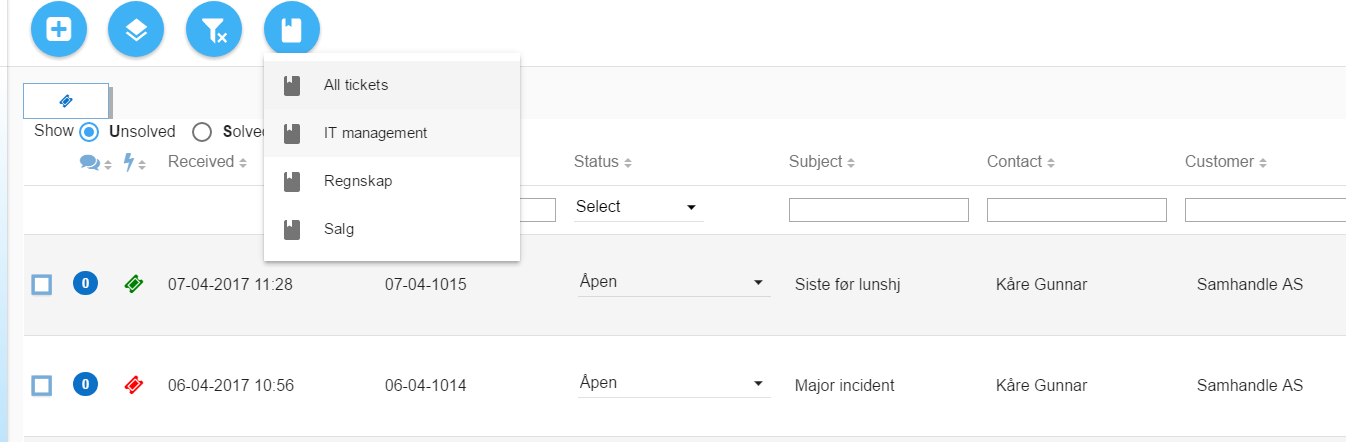
 Give the reminder an name that will help you identify it later on.
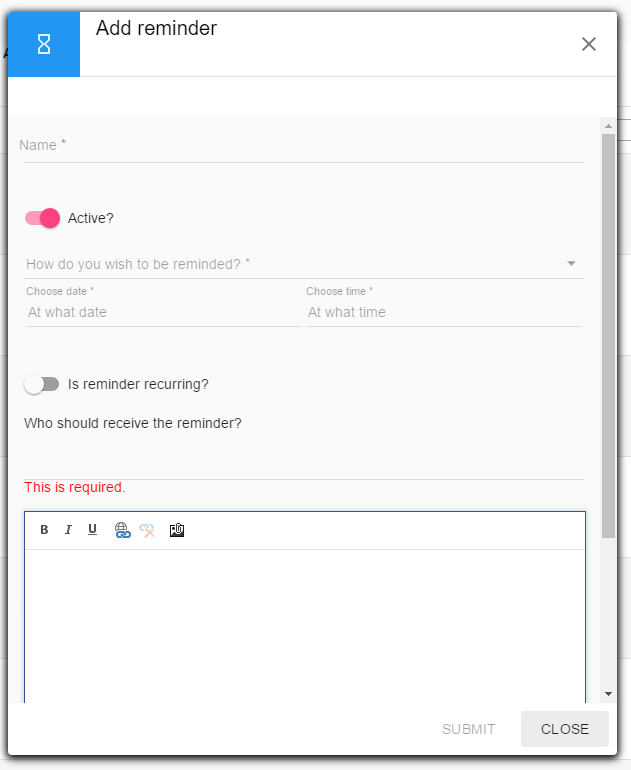 Select if the reminder should be active or not
 Click to choose from a list how you wish to be reminded. At the moment only E-mail is possible.
 Click what date and time you want the reminder to send you the reminder
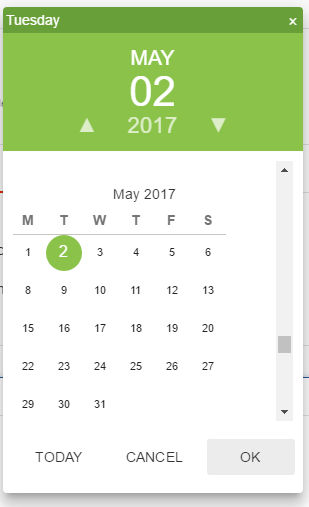
 When you click the date field you are presented with this window. Select what day of the month/year you wish an reminder.
After making your selection, click OK
When you click the date field you are presented with this window. Select what day of the month/year you wish an reminder.
After making your selection, click OK
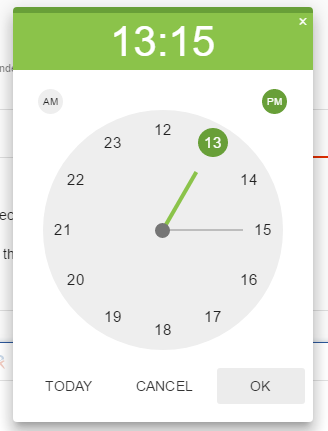
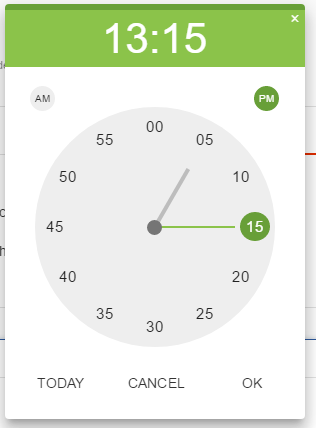
 Then you click the time field to open the following window. Here you will first choose what hour, then it will ask you for the minute.
 After setting the date and time, select if the reminder is supposed to be run more than once.
 If this is switched on, select how often the reminder should be sent.
 Next, enter the email address of the person that will receive the reminder.
It will search through the list of agents to present you with options. If the reminder is to be sent to
someone not in the list you just type the address and push the enter key.
Next, enter the email address of the person that will receive the reminder.
It will search through the list of agents to present you with options. If the reminder is to be sent to
someone not in the list you just type the address and push the enter key.
 Finally, enter the text you wish to send in the reminder
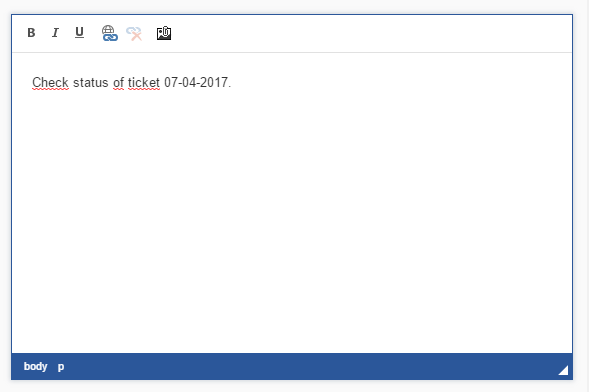 If all required fields has been filled out, you can click Submit.
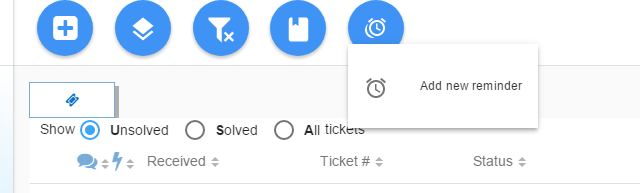
 The new reminder will show up in the Reminders menu.
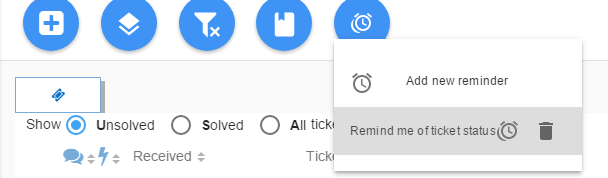 Clicking the thrashbin will delete the reminder.
 This icon tells you that the reminder is active
 This icon tells you that the reminder is disabled (not active)

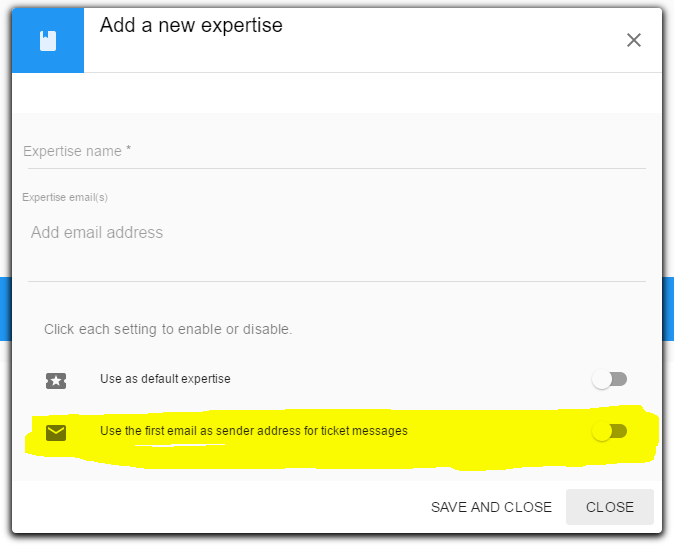 If you add more than 1 email address to the expertise only the first you add will be used as a sender address.
After this has been set all outgoing messages from tickets that are a member of the set expertise will use the expertises email address instead of SmartDialog main email.
If you add more than 1 email address to the expertise only the first you add will be used as a sender address.
After this has been set all outgoing messages from tickets that are a member of the set expertise will use the expertises email address instead of SmartDialog main email.