04.07.2017 - Large update
This update will be published 03.07.2017 between 21:00 and 24:00
New features
2. S.I.D (Smart Interactive Dialogue) and A.N.N (Artificial Neural Network).
We are proud to introduce SID. SID will help you solve tickets based on earlier solved tickets.
ANN is SID's brain and retreives, processes and returns answers to all input given to SID.
SID will then process the results and display it to you in a display friendly way.

For SID and ANN to work properly it is very important that tickets that are solved receive detailed solutions as to how the ticket was solved.

SID's brain ANN works a lot like the human brain; If you teach it the wrong answers, it will only give the wrong answers.

So having detailed and correct solutions is imperative for having this highly time saving feature to work.


To enable SID and ANN your superuser will need to open SmartDialog settings and enable SID and ANN in the Ticket settings

Enabling Google suggestions will have SID do an Google search based on the tickets problem description and present the agent with the search results.
Google suggestions will only be presented if he is not able to find any similar problems in the existing ticket database.


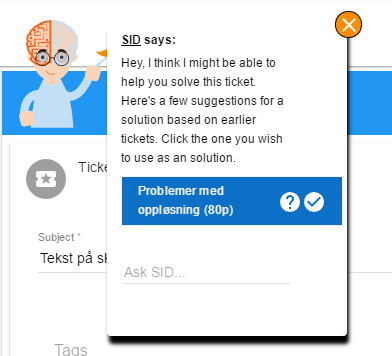
Once you open a ticket, SID will appear in the top left corner like this


Hover your mouse over the Question mark to see the suggestions problem description, hover over the checkmark to see the suggested solution.
Clicking an suggestion will autofill the Ticket reply text in the current ticket.
 Enabling Google suggestions will have SID do an Google search based on the tickets problem description and present the agent with the search results.
Google suggestions will only be presented if he is not able to find any similar problems in the existing ticket database.
Once you open a ticket, SID will appear in the top left corner like this
Enabling Google suggestions will have SID do an Google search based on the tickets problem description and present the agent with the search results.
Google suggestions will only be presented if he is not able to find any similar problems in the existing ticket database.
Once you open a ticket, SID will appear in the top left corner like this
 Hover your mouse over the Question mark to see the suggestions problem description, hover over the checkmark to see the suggested solution.
Clicking an suggestion will autofill the Ticket reply text in the current ticket.
Hover your mouse over the Question mark to see the suggestions problem description, hover over the checkmark to see the suggested solution.
Clicking an suggestion will autofill the Ticket reply text in the current ticket.
3. Change colors and text on the portal page.
You are now able to change background colors, text color, size etc. You can even add your own images and text to the page.


You have to sign in to get access to this feature.


Click SIGN IN and enter your username and password.


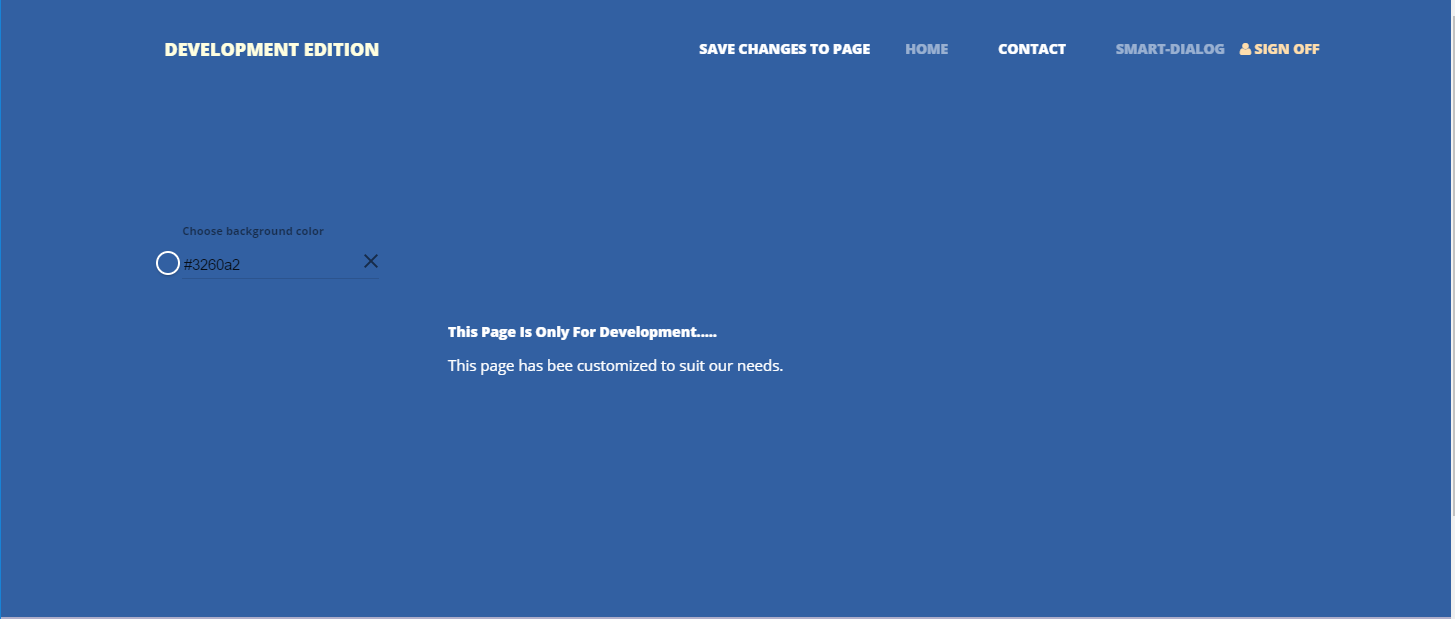
Next you will get a page similar to this, the page in the example has been customized using the new customization feature.


You are not able to make changes to the top menu, this will be implemented in future releases.


To change the page title, wich in this example is "Development edition", simply click the text you wish to change and type in another.
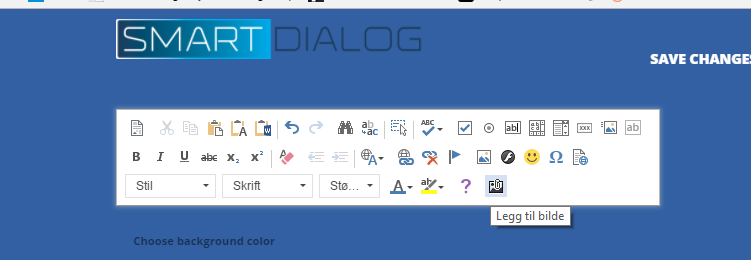
You can also remove the text and insert an image as demonstrated in this screenshot:


You simply remove the text and click the Add picture button.


You can change the background of the top page, contact page and the footer page.


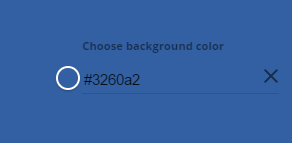
All three pages has an control that lets you either type the color code directly, or click the circle to open a color picker


The color will change when you select the new color or start typing in the color code.


Remmember to click "Save changes to page" when you are done editing.
 Click SIGN IN and enter your username and password.
Next you will get a page similar to this, the page in the example has been customized using the new customization feature.
Click SIGN IN and enter your username and password.
Next you will get a page similar to this, the page in the example has been customized using the new customization feature.
 You are not able to make changes to the top menu, this will be implemented in future releases.
To change the page title, wich in this example is "Development edition", simply click the text you wish to change and type in another.
You can also remove the text and insert an image as demonstrated in this screenshot:
You are not able to make changes to the top menu, this will be implemented in future releases.
To change the page title, wich in this example is "Development edition", simply click the text you wish to change and type in another.
You can also remove the text and insert an image as demonstrated in this screenshot:
 You simply remove the text and click the Add picture button.
You can change the background of the top page, contact page and the footer page.
All three pages has an control that lets you either type the color code directly, or click the circle to open a color picker
You simply remove the text and click the Add picture button.
You can change the background of the top page, contact page and the footer page.
All three pages has an control that lets you either type the color code directly, or click the circle to open a color picker
 The color will change when you select the new color or start typing in the color code.
Remmember to click "Save changes to page" when you are done editing.
The color will change when you select the new color or start typing in the color code.
Remmember to click "Save changes to page" when you are done editing.4. Display and search through the problem text in tickets from the ticket overview. It is now possible to view a tickets problem text without opening the ticket. This is a feature that your superuser needs to enable in SmartDialog settings and under Ticket settings. Hover the mouse over the question mark in the Problem column of the ticket overview. You can also search through the text by clicking the search field on top and start typing. Be aware that doing this search can take some time depending on how many tickets you are searching through.
 Hover the mouse over the question mark in the Problem column of the ticket overview.
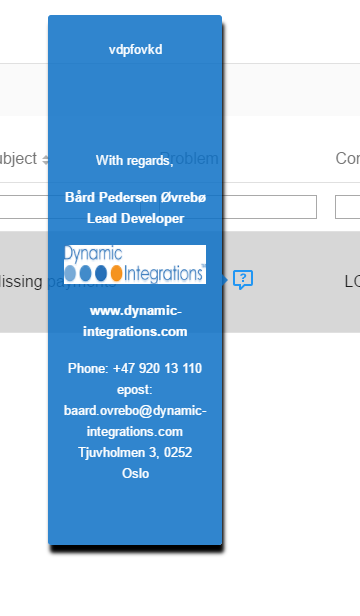 You can also search through the text by clicking the search field on top and start typing.
Be aware that doing this search can take some time depending on how many tickets you are searching through.
You can also search through the text by clicking the search field on top and start typing.
Be aware that doing this search can take some time depending on how many tickets you are searching through.5. Remove confirmation dialogue when asigning ticket to self. When clicking the unassigned value in ticket overview you will normally be asked to confirm. It is now possible through SmartDialog settings to disable the confirmation dialogue and just assign the ticket to the agent right away.

6. Unlock a locked ticket.
It is now possible to unlock a ticket that has been locked due to an agent is working in ticket.
This should be used with caution, only unlock the ticket if you are certain that no one else is working in the ticket.
Open the locked ticket, on your keyboard push the ALT key and U key together.

PS: If you do not know the keyboard shortcuts in the application you can push the SHIFT key and ? key together to get an explanation.

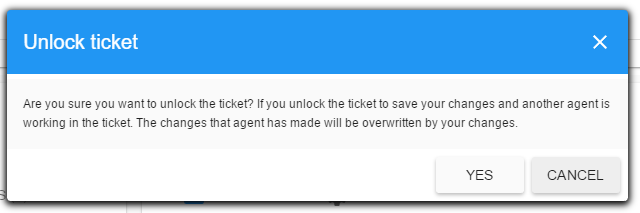
Once you have pushed the ALT-U combination you will get this confirmation.

Click Yes and the ticket will be reopened and assigned to you.
 Click Yes and the ticket will be reopened and assigned to you.
7. Create predefined replies for tickets. It is now possible to create predefined replies for ticket. A superuser can create these by clicking the Orange superuser menu in a ticket and click the following button (marked in yellow). After clicking the button the following window will open. Select the expertise that you wish to create predefined ticket replies for. Next you can either select an existing template to edit by clicking the dropdown menu that says "Select template to edit" Then select a template. In this example i select the template called Passordendring. You are now able to change the text contents by editing the large text window. If you want to create a new template, click the + button as marked in yellow in this example. After clicking + the Name input box will be focused. Give the template a friendly name. A name that describes what the template contains. A brief and short summary. Next you click the large textarea underneath and start typing the mesage. You do not need to click the Save button each time you do create, edit or delete a template. But it is important that you click the Save button before you click Close. If you do not, all changes will be lost. In order to use the templates in a ticket you can open a ticket, selec the correct expertise for the ticket Next. Click the ticket reply tab in the ticket header. You will now see an dropdown list and the ticket reply message underneath as in this screenshot Click the dropdown menu and select the template you wish to use In this example i choose the Passordendring template. As you can see, the ticket reply gets the same text as you wrote in the template management window. It is also possible to show the template selector for ticket messages. Both when creating a new ticket message and replying to one. Click the predefined replies dropdownmenu and choose the template relevant for the email. You can search for templates by clicking the search field and start typing. Clicking a template will copy the text to the outgoing text. It will also include the signature at the end.
 After clicking the button the following window will open.
Select the expertise that you wish to create predefined ticket replies for.
After clicking the button the following window will open.
Select the expertise that you wish to create predefined ticket replies for.
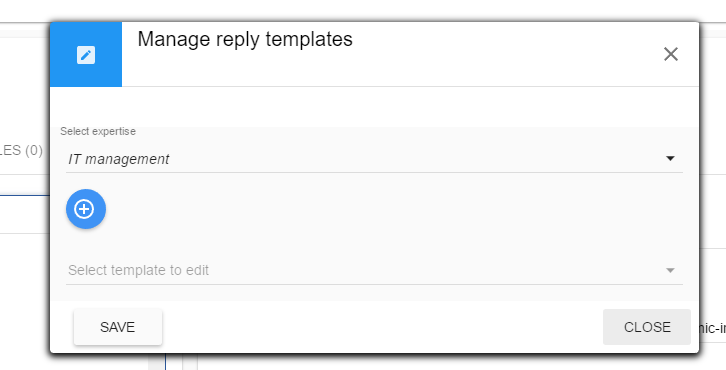 Next you can either select an existing template to edit by clicking the dropdown menu that says "Select template to edit"
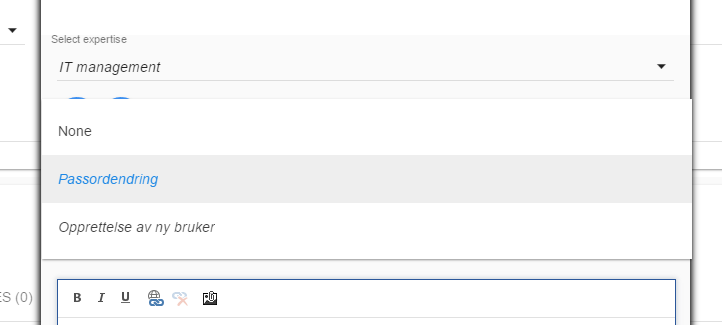 Then select a template. In this example i select the template called Passordendring. You are now able to change the
text contents by editing the large text window.
Then select a template. In this example i select the template called Passordendring. You are now able to change the
text contents by editing the large text window.
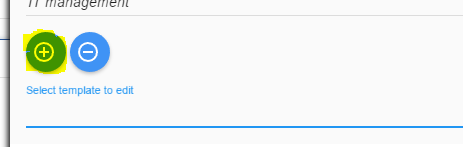
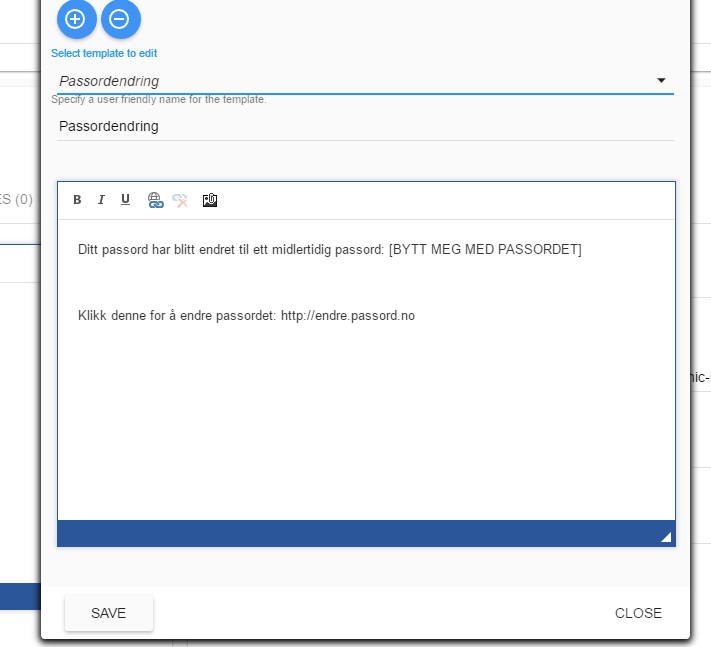 If you want to create a new template, click the + button as marked in yellow in this example.
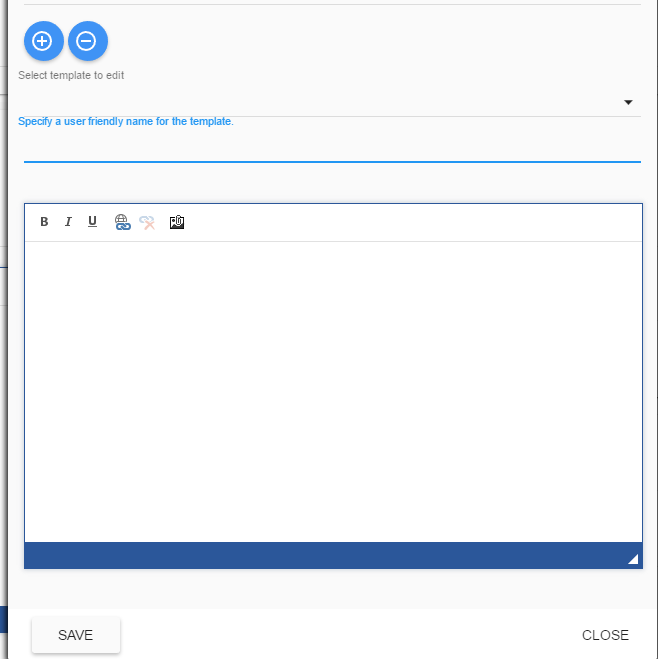
 After clicking + the Name input box will be focused. Give the template a friendly name.
A name that describes what the template contains. A brief and short summary.
Next you click the large textarea underneath and start typing the mesage.
After clicking + the Name input box will be focused. Give the template a friendly name.
A name that describes what the template contains. A brief and short summary.
Next you click the large textarea underneath and start typing the mesage.
 You do not need to click the Save button each time you do create, edit or delete a template. But it is important
that you click the Save button before you click Close. If you do not, all changes will be lost.
In order to use the templates in a ticket you can open a ticket, selec the correct expertise for the ticket
You do not need to click the Save button each time you do create, edit or delete a template. But it is important
that you click the Save button before you click Close. If you do not, all changes will be lost.
In order to use the templates in a ticket you can open a ticket, selec the correct expertise for the ticket
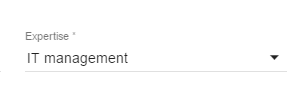 Next. Click the ticket reply tab in the ticket header.
 You will now see an dropdown list and the ticket reply message underneath as in this screenshot
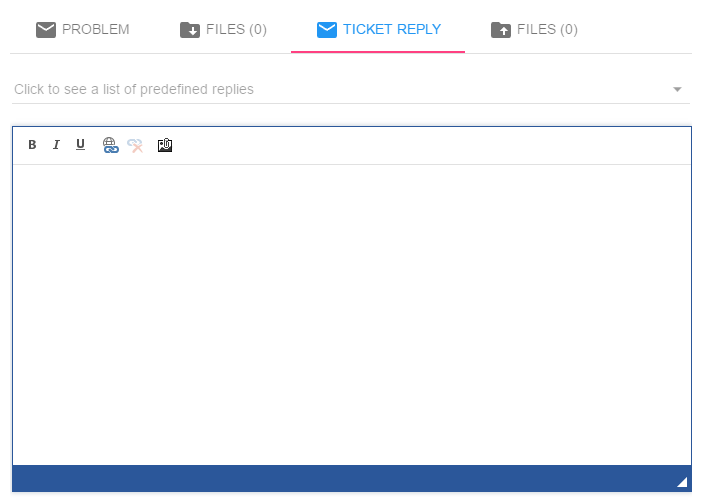 Click the dropdown menu and select the template you wish to use
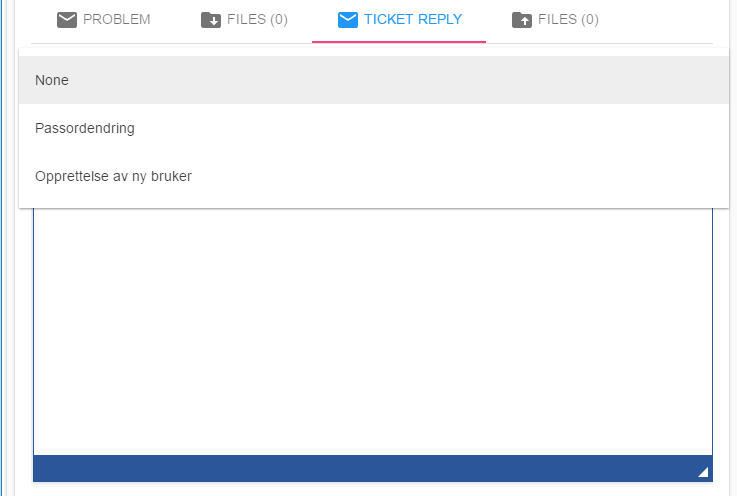 In this example i choose the Passordendring template. As you can see, the ticket reply gets the same text
as you wrote in the template management window.
In this example i choose the Passordendring template. As you can see, the ticket reply gets the same text
as you wrote in the template management window.
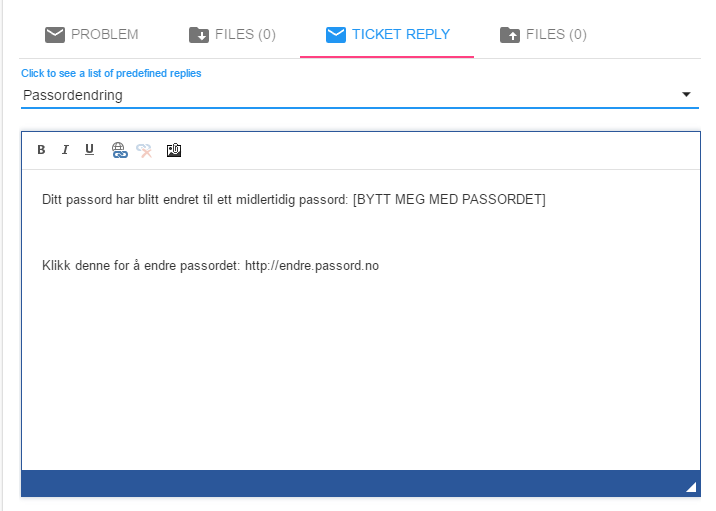 It is also possible to show the template selector for ticket messages.
Both when creating a new ticket message and replying to one.
Click the predefined replies dropdownmenu and choose the template relevant for the email.
It is also possible to show the template selector for ticket messages.
Both when creating a new ticket message and replying to one.
Click the predefined replies dropdownmenu and choose the template relevant for the email.
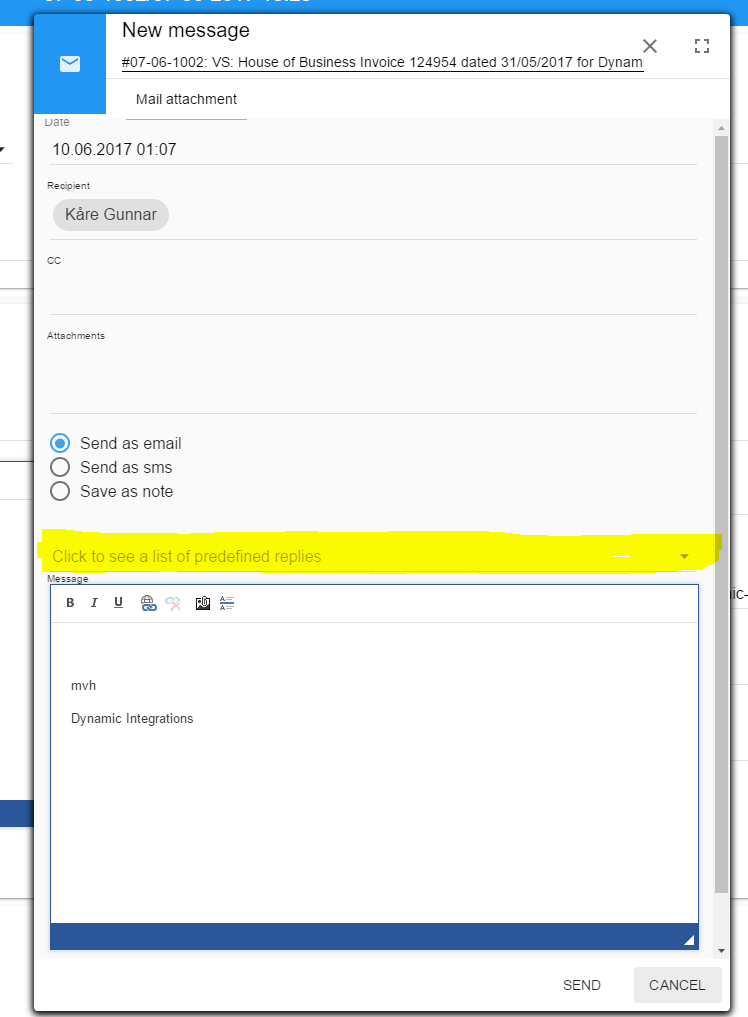 You can search for templates by clicking the search field and start typing.
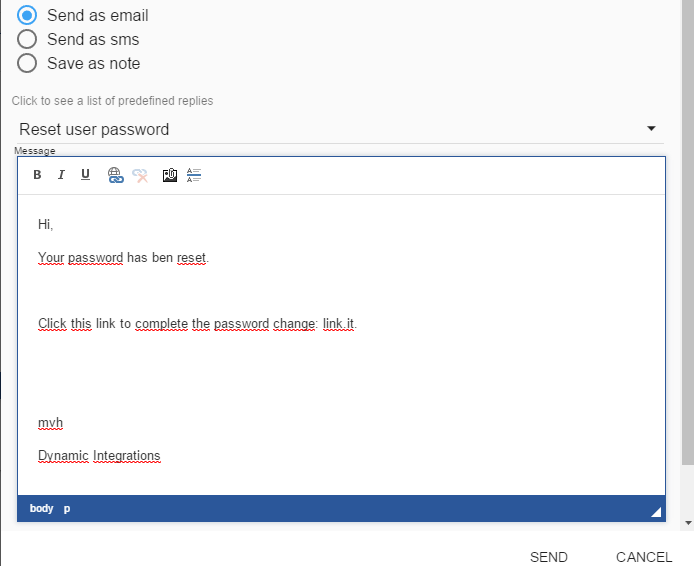
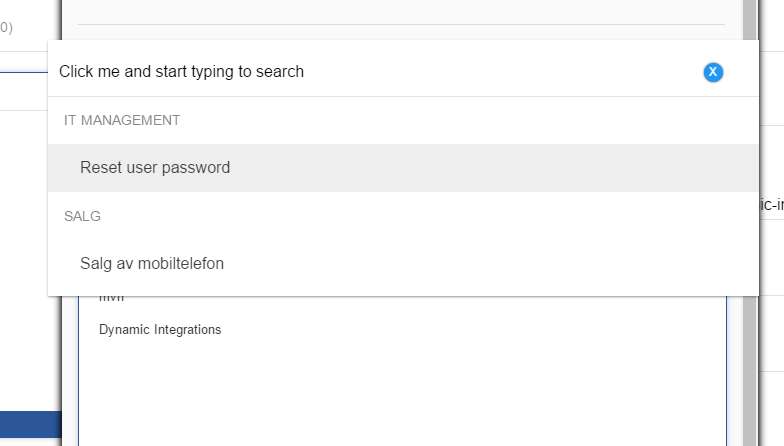 Clicking a template will copy the text to the outgoing text. It will also include the signature at the end.
8. Ask for ticket solution if missing when setting ticket to a solved status
You will now be asked for the ticket solution when setting a ticket to a solved status without entering the solution before the status change.


Type the solution to use and click "Save". The ticket will then be updated with the entered solution.

You do however need to save ticket changes afterwards.
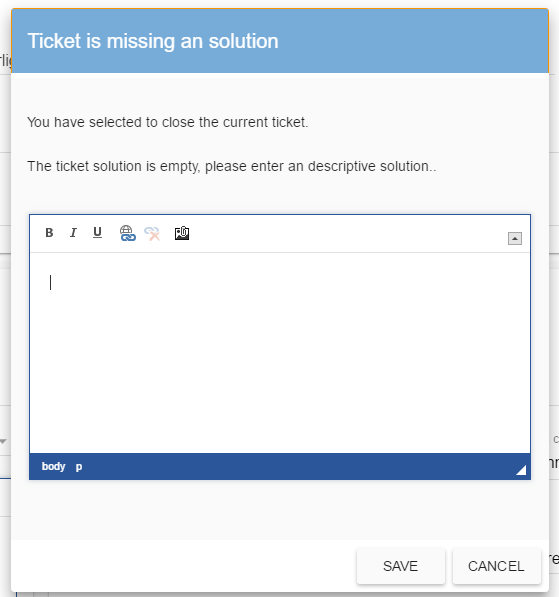 Type the solution to use and click "Save". The ticket will then be updated with the entered solution.
You do however need to save ticket changes afterwards.
Type the solution to use and click "Save". The ticket will then be updated with the entered solution.
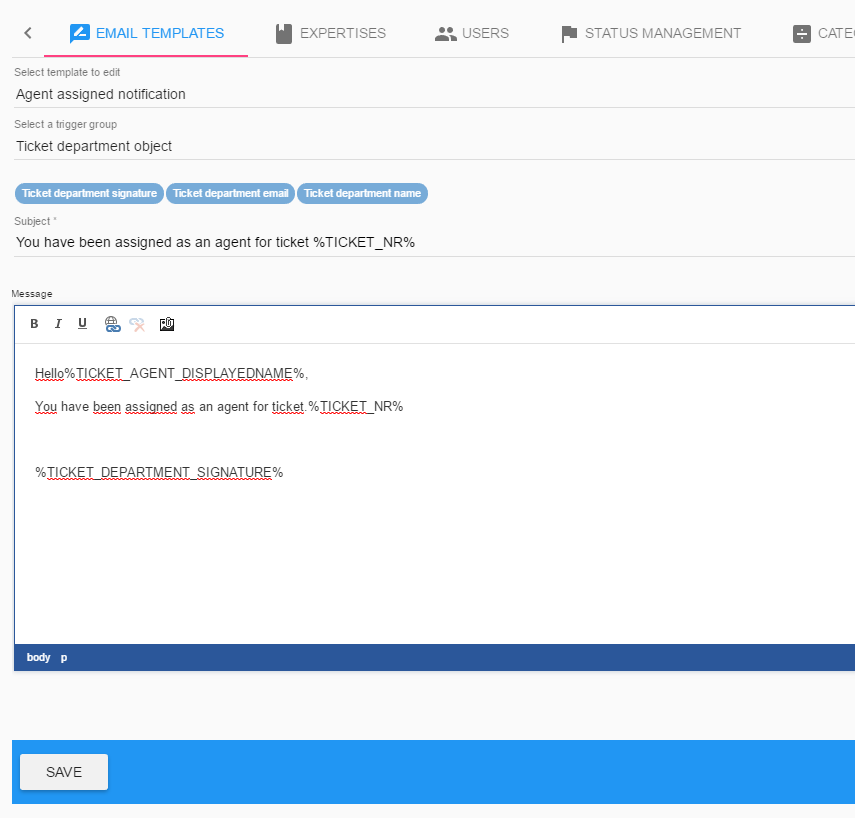
You do however need to save ticket changes afterwards. 9. Notify an agent when being assigned to ticket. If the following setting for an agent has been enabled he/she will receive an email when being assigned as an agent by someone else. When activated an email will be sent to the agent. The contents of the email can be edited under SmartDialog settings and Email templates
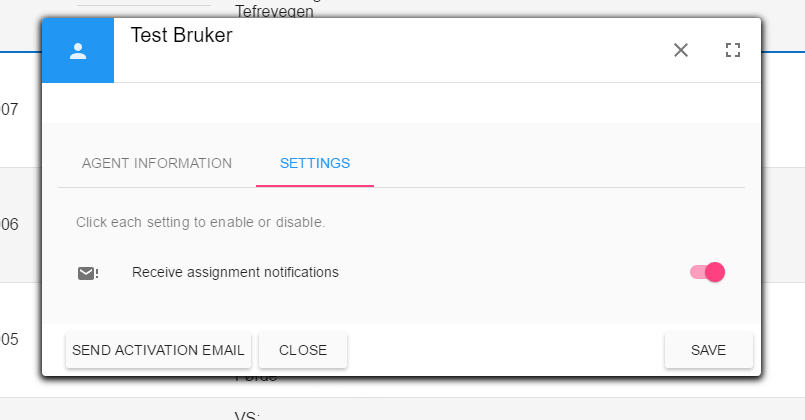 When activated an email will be sent to the agent.
The contents of the email can be edited under SmartDialog settings and Email templates
When activated an email will be sent to the agent.
The contents of the email can be edited under SmartDialog settings and Email templates
11. Agent chat
This version introduces the Chat feature. You can chat with other agents and guests.
It is located on the right side bar after clicking the notifications button. (Marked in yellow)


A toolbar opens on the right side of the screen. Click chat.


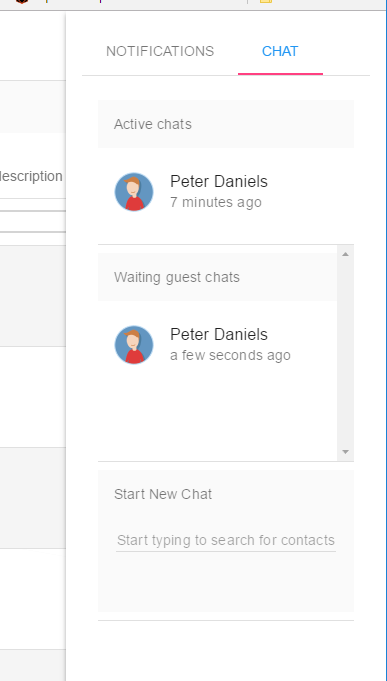
You are presented with the chat screen.


In this example you can see that the agent has an active chat going with Peter Daniels.
At the same time Peter Daniels has also submited an new chat request.


Chat requests listed under "Waiting guest chats" is visible to all agents.


Once an agent clicks the request he/she is assigned to that chat.


The chat is then moved to Active chats and removed for other agents.


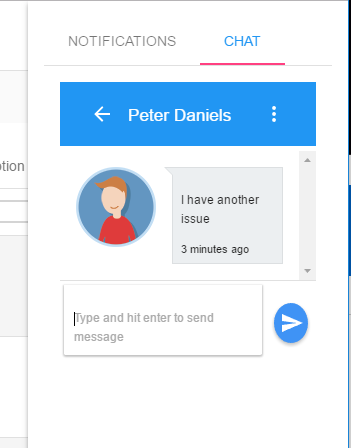
Clicking the chat request opens a chat window where the agent can chat.
It will also display messages that are sent from the guest.


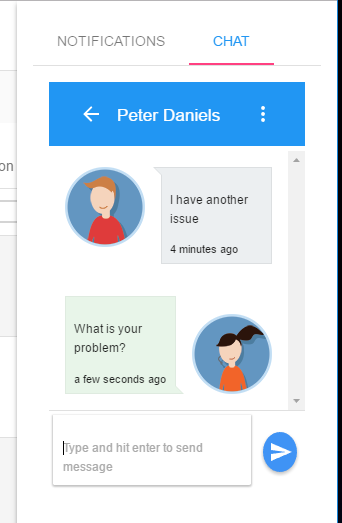
Type a message in the text field, you can also drag images and files to the text field to send to the guest.

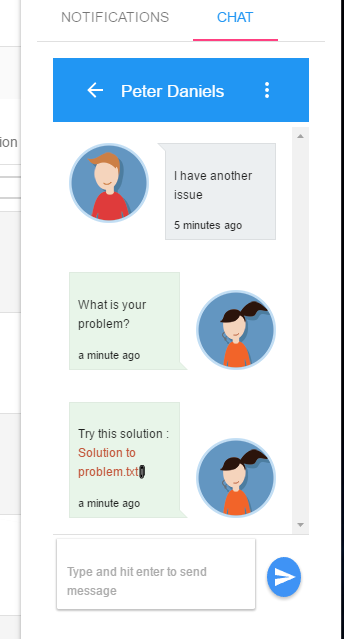
In this example the agent has dragged and dropped a file named "Solution to problem.txt".


If the guest clicks the lin, he/she will download or open the file.


Agent can also initiate an video/voice chat by using appearIn.
Click the 3 dots on the right side of the guests name.


Next click Video/voice chat.
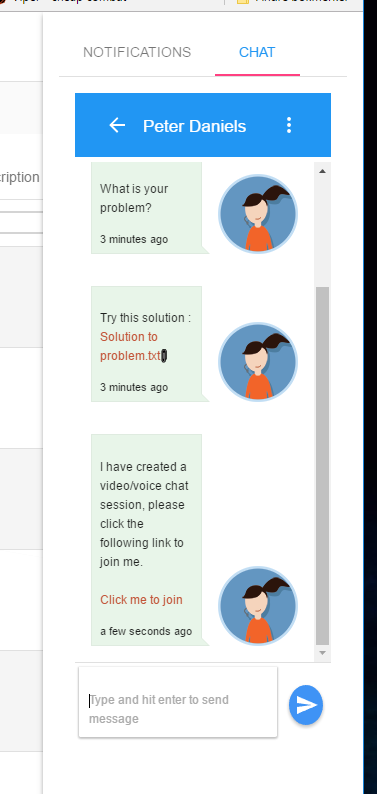
A link will be sent to the guest and a new window opens for you.


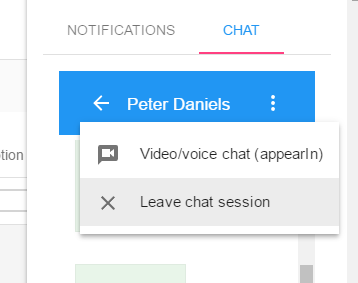
When done chatting you can "Leave chat session"


You are sent back to the chat list.


The waiting chats is now gone.
This is because no more requests from guests exist.


Also it is not listed in active chats since you left the chat session.


If you wish to chat with another agent or customer you
can click the field saying "Start typing to search for contacts"


Start searching for the user you wish to talk to:

Click the user and a new chat window appears.


Type a message and send it to the agent.


You have now created a new active chat.


Click the arrow to go back to the list.


The active chats list now contains a new chat.


This is the chat you just started with Kåre IT.


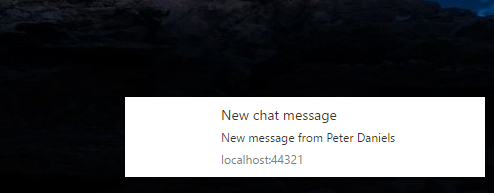
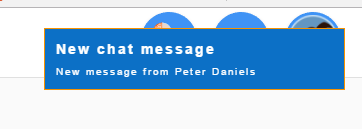
If the right toolbar is closed you will receive notifications
in SmartDialog and in your browser if new messages are received.


Browser notification


SmartDialog notification:


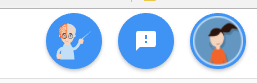
In addition the notification button will change to display an exclamation.


Click the button to display notifications


You can click the notification to remove them.


To read the message you have to click Chat and enter the correct chat.
13. Convert a registered ticket to a ticket message.
It is now possible to convert an already registered ticket to an ticket message from the ticket overview.
Click the menu button for the ticket you wish to convert.


Select convert to ticket message


You will receive a warning. It is safe to click yes since the actual conversion won't happen until next step.


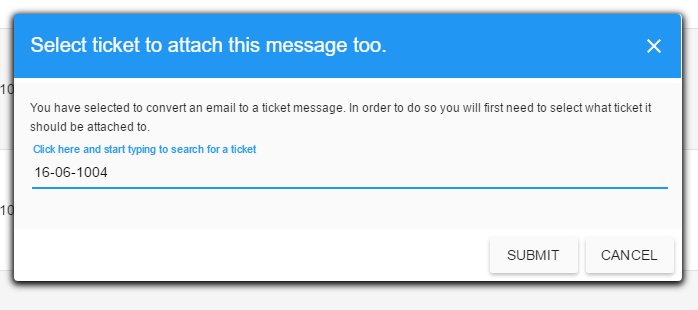
Next. Click the ticket search field and start searching using the ticket number or subject field


Select the ticket from the list and click Submit


After a little while your ticket will be converted and the ticket you selected will receive an unread message.
Fixes
1. Agent/user list now displays the correct access level instead of an number in SmartDialog settings.
2. When creating a new agent/user the user will receive an activation email.
The email contains the users username and a link where he/she has to fill in the username and choose a password.
3. When setting a ticket to solved from the ticket overview and the ticket is unassigned the ticket will remain unassigned.
If you finish a ticket directly from ticket overview it will assign the ticket to you automatically if the ticket is unassigned.
4. When setting status to solved in Ticket overview and clicking cancel the new status is still visible in the overview.
This has now been fixed. Clicking cancel will now return the old status.
5. If ticket is already opened by another agent you cant see who.
This is now fixed. Hovering your mouse over the padlock in ticket overview or the save button in the opened ticket will reveal who is working in the current ticket.
6. When closing ticket from ticketoverview the ticket reply is not focused default.
When you now try to close a ticket from the ticket overview the ticket reply will be selected when the window show. This enables you to start typing without needing to click the text area first.
7. When searching for a ticket when converting an email to ticket message you are not always able to select the ticket.
This is now fixed.
8. When assigning a ticket from ticket overview an automatic email is not sent.
This is now fixed
9. When receiving emails with a large number of attachments it wont save the email to the database. Leaving the ticket in SmartDialog unable to get the original email.
This issue has been fixed.
10. When setting ticket messages to be sent from expertise it did not work.
The issue has been resolved.
11. When searching in Service, area and description in ticket overview you sometimes got invalid results.
The issue should be resolved. Please report to support@smart-dialog.net if the issue is still showing.
12. Menu's now closes automatically when moving the mouse pointer outside of the menu content.
13. Opening a ticket message from the ticket overview. (Clicking the unread number) wouldn't display the attachments.
This is now fixed.
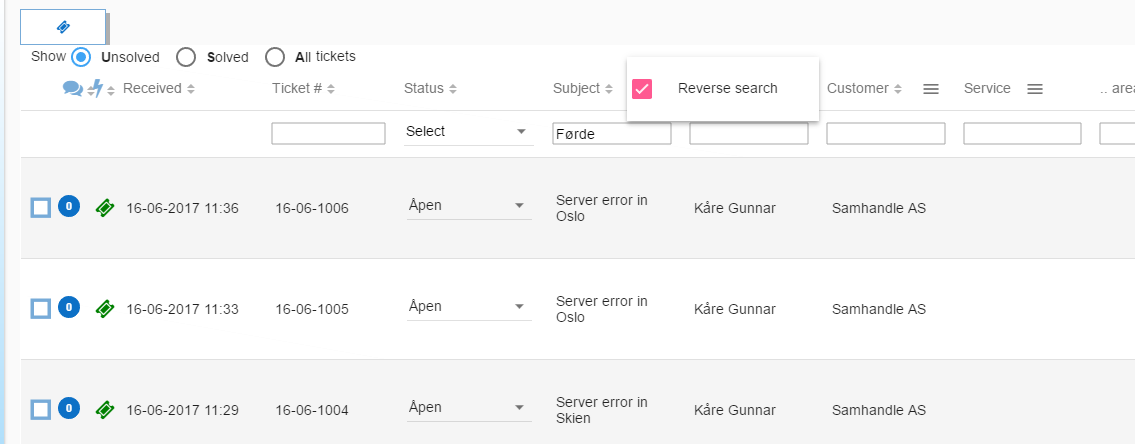
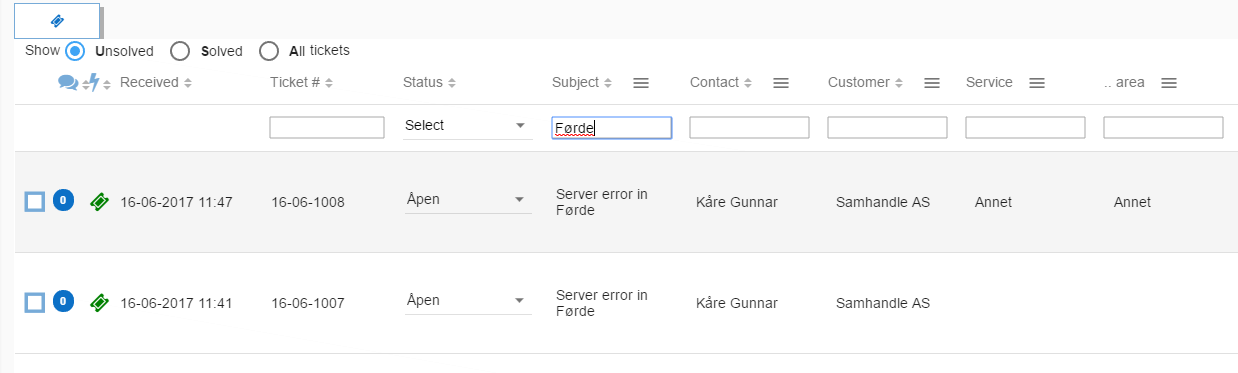 Now I want to show tickets that does not contain the text Førde. I then click the menu object for the subject column
 Next I check the Reverse search checkbox. You are now presented with tickets that does not contain the text Førde.
 A toolbar opens on the right side of the screen. Click chat.
You are presented with the chat screen.
In this example you can see that the agent has an active chat going with Peter Daniels.
At the same time Peter Daniels has also submited an new chat request.
Chat requests listed under "Waiting guest chats" is visible to all agents.
Once an agent clicks the request he/she is assigned to that chat.
The chat is then moved to Active chats and removed for other agents.
A toolbar opens on the right side of the screen. Click chat.
You are presented with the chat screen.
In this example you can see that the agent has an active chat going with Peter Daniels.
At the same time Peter Daniels has also submited an new chat request.
Chat requests listed under "Waiting guest chats" is visible to all agents.
Once an agent clicks the request he/she is assigned to that chat.
The chat is then moved to Active chats and removed for other agents.
 Clicking the chat request opens a chat window where the agent can chat.
It will also display messages that are sent from the guest.
Clicking the chat request opens a chat window where the agent can chat.
It will also display messages that are sent from the guest.
 Type a message in the text field, you can also drag images and files to the text field to send to the guest.
 In this example the agent has dragged and dropped a file named "Solution to problem.txt".
If the guest clicks the lin, he/she will download or open the file.
In this example the agent has dragged and dropped a file named "Solution to problem.txt".
If the guest clicks the lin, he/she will download or open the file.
 Agent can also initiate an video/voice chat by using appearIn.
Click the 3 dots on the right side of the guests name.
Agent can also initiate an video/voice chat by using appearIn.
Click the 3 dots on the right side of the guests name.
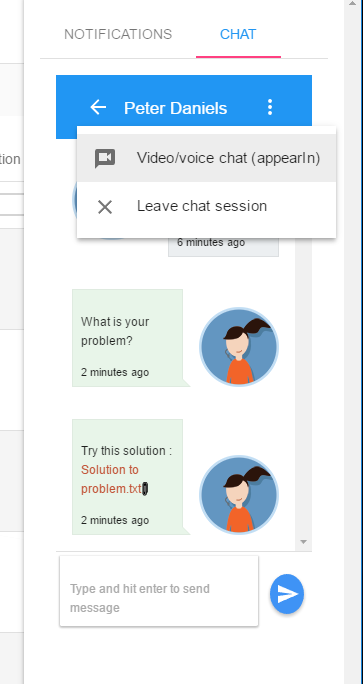 Next click Video/voice chat.
A link will be sent to the guest and a new window opens for you.
Next click Video/voice chat.
A link will be sent to the guest and a new window opens for you.
 When done chatting you can "Leave chat session"
 You are sent back to the chat list.
The waiting chats is now gone.
This is because no more requests from guests exist.
Also it is not listed in active chats since you left the chat session.
You are sent back to the chat list.
The waiting chats is now gone.
This is because no more requests from guests exist.
Also it is not listed in active chats since you left the chat session.
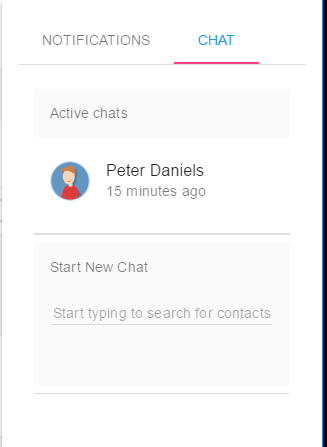 If you wish to chat with another agent or customer you
can click the field saying "Start typing to search for contacts"
Start searching for the user you wish to talk to:
If you wish to chat with another agent or customer you
can click the field saying "Start typing to search for contacts"
Start searching for the user you wish to talk to:
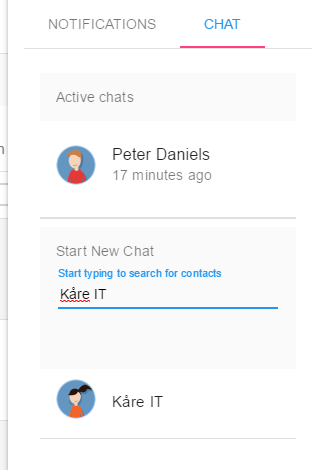 Click the user and a new chat window appears.
Type a message and send it to the agent.
You have now created a new active chat.
Click the user and a new chat window appears.
Type a message and send it to the agent.
You have now created a new active chat.
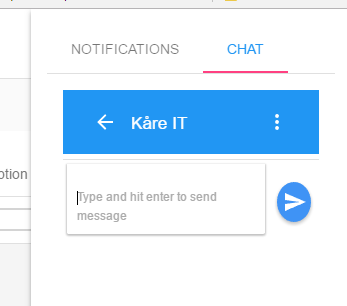 Click the arrow to go back to the list.
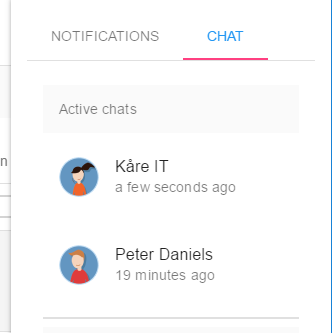
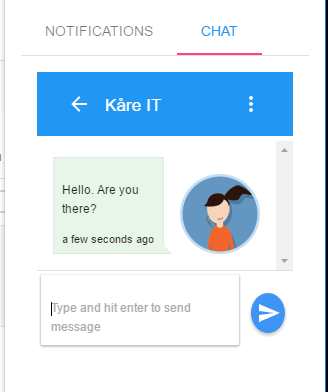 The active chats list now contains a new chat.
This is the chat you just started with Kåre IT.
The active chats list now contains a new chat.
This is the chat you just started with Kåre IT.
 If the right toolbar is closed you will receive notifications
in SmartDialog and in your browser if new messages are received.
Browser notification
If the right toolbar is closed you will receive notifications
in SmartDialog and in your browser if new messages are received.
Browser notification
 SmartDialog notification:
 In addition the notification button will change to display an exclamation.
 Click the button to display notifications
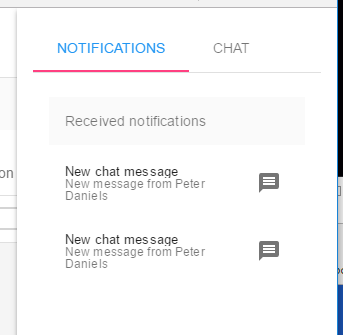 You can click the notification to remove them.
To read the message you have to click Chat and enter the correct chat.
You can click the notification to remove them.
To read the message you have to click Chat and enter the correct chat.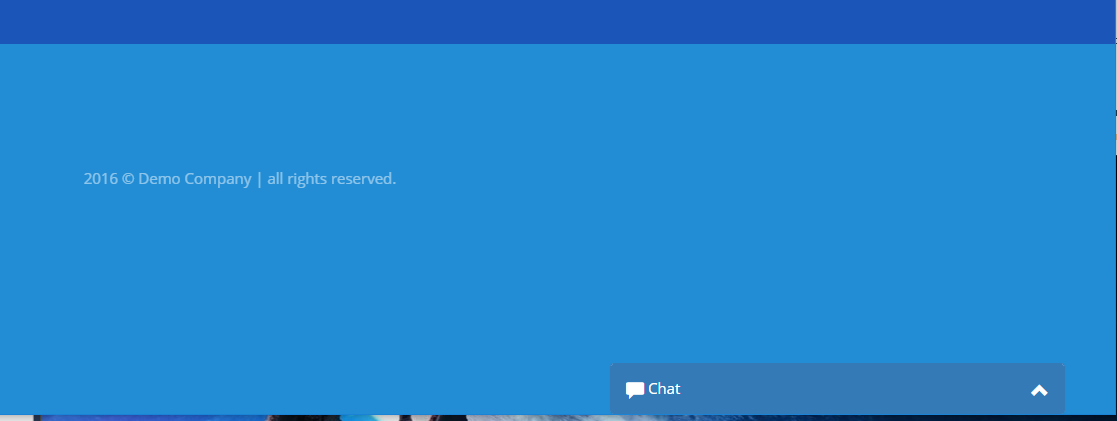 Click the chat line in order to open the chat.
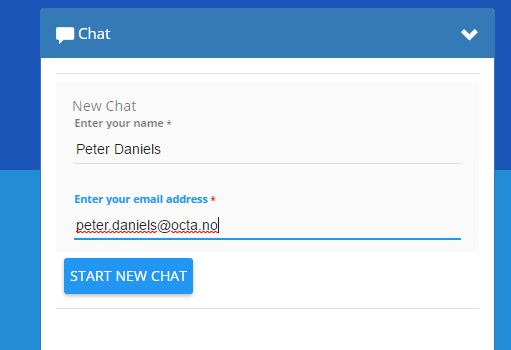
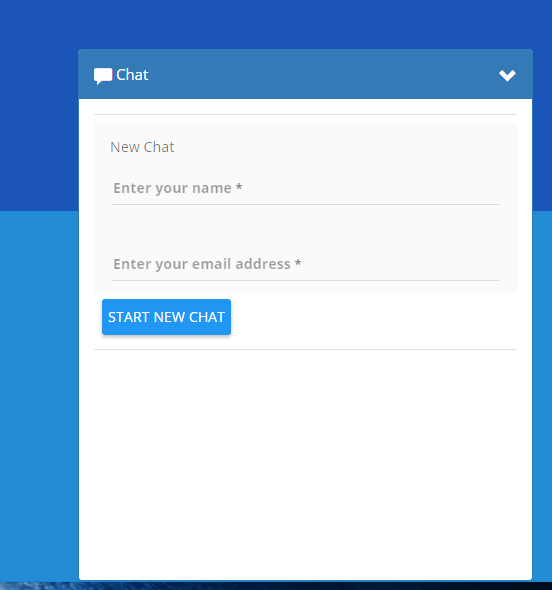 Once open the guest must type in a name and email.
When clicking "Start new chat" the guest name and email will be stored in a cookie.
This means that SmartDialog portal will remmember the guest details the next time they visit.
Once open the guest must type in a name and email.
When clicking "Start new chat" the guest name and email will be stored in a cookie.
This means that SmartDialog portal will remmember the guest details the next time they visit.
 After clicking "Start new chat" the guest is brought into the chat window.
Here they can start typing right away.
They can also send images and files by using drag and drop onto the text field.
After clicking "Start new chat" the guest is brought into the chat window.
Here they can start typing right away.
They can also send images and files by using drag and drop onto the text field.
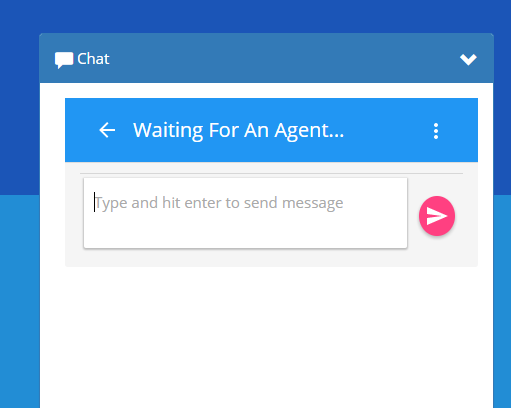 The title of the chat says waiting for an agent.
The guest does not have to be wait in the chat room.
Click back on the arrow facing left.
The title of the chat says waiting for an agent.
The guest does not have to be wait in the chat room.
Click back on the arrow facing left.
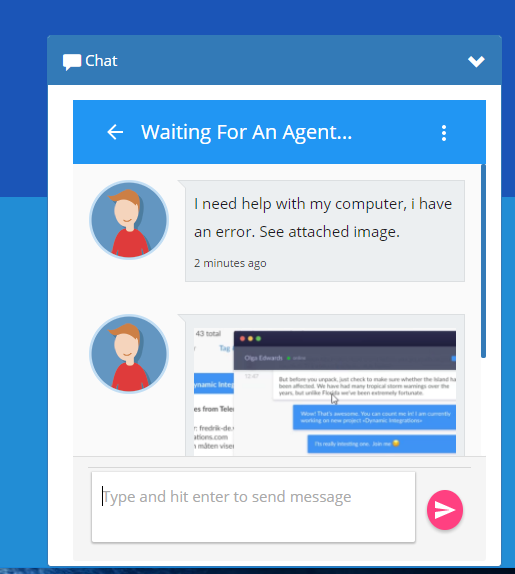 The guest is then brought back to the chat list.
This list shows all chats the guest has not left.
Once an agent grabs a chat request the text will change to the agents name.
The guest is then brought back to the chat list.
This list shows all chats the guest has not left.
Once an agent grabs a chat request the text will change to the agents name.
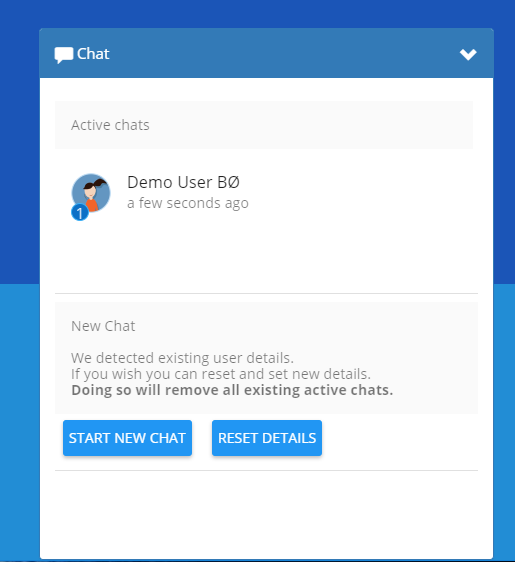
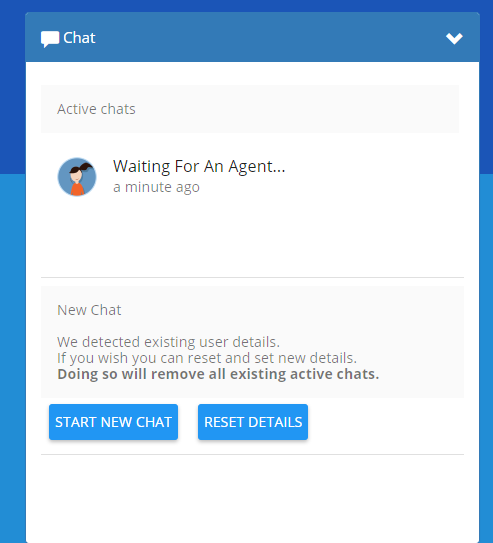 If the agent types anything the chat will be updated with an unread object.
Guest can just click the decired chat to read and send messages.
If the agent types anything the chat will be updated with an unread object.
Guest can just click the decired chat to read and send messages.
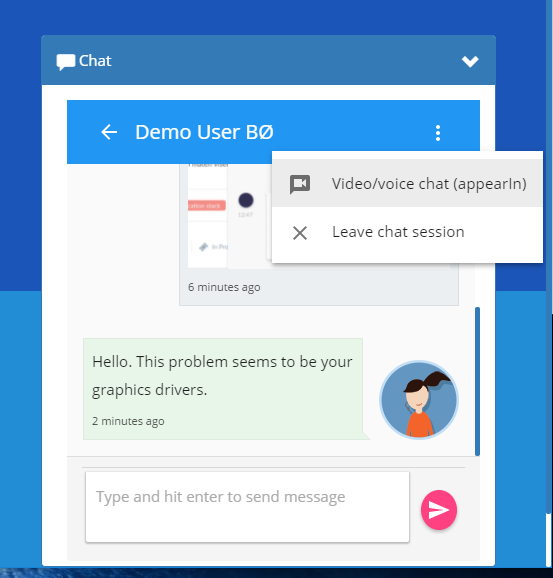
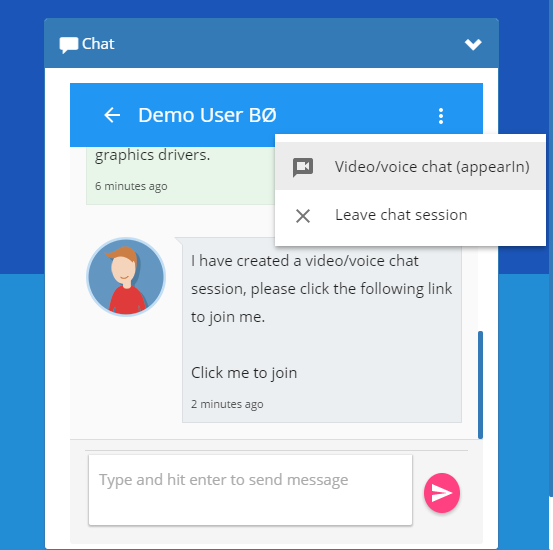
 Once in the room you can continue chatting using text or you can click the menu.
The three dots to the right of the agent's name.
You are now able to start an video/voice chat.
Once in the room you can continue chatting using text or you can click the menu.
The three dots to the right of the agent's name.
You are now able to start an video/voice chat.
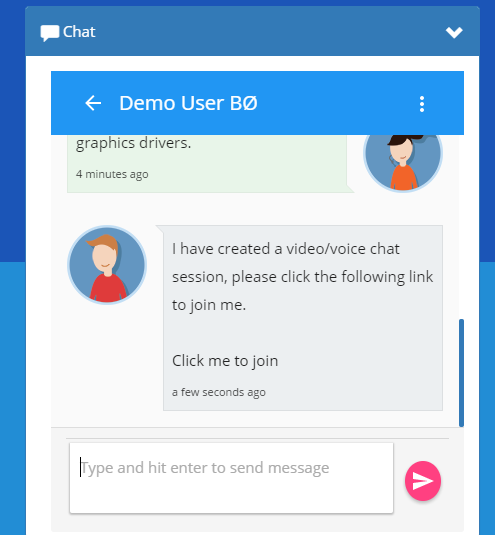
 Once clicked a new window opens for the guest to allow access to the camera and/or microphone for the appearIn room
At the same time a message is posted to the agent with a link that the agent can click in order to join the appearIn room.
Once clicked a new window opens for the guest to allow access to the camera and/or microphone for the appearIn room
At the same time a message is posted to the agent with a link that the agent can click in order to join the appearIn room.
 If finished with the chat, the guest can click the menu button and choose "Leave chat session"
The chat will be archived and not visible to the guest anymore.
The agent will still be in the session, if he/she types anything the guest will be re-added.
If finished with the chat, the guest can click the menu button and choose "Leave chat session"
The chat will be archived and not visible to the guest anymore.
The agent will still be in the session, if he/she types anything the guest will be re-added.
 Select convert to ticket message
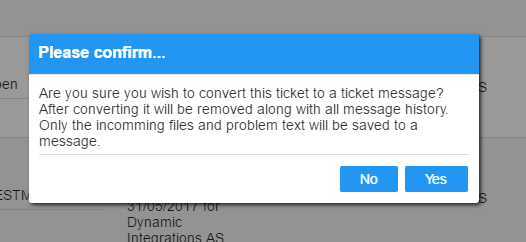
 You will receive a warning. It is safe to click yes since the actual conversion won't happen until next step.
 Next. Click the ticket search field and start searching using the ticket number or subject field
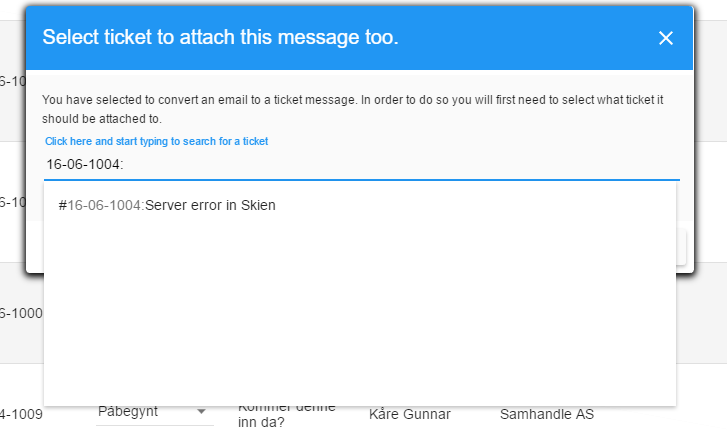 Select the ticket from the list and click Submit
 After a little while your ticket will be converted and the ticket you selected will receive an unread message.
